Running Demultiplex Reads
To run Demultiplex Reads, go to:
Tools | Prepare Sequencing Data (![]() ) | Demultiplex Reads (
) | Demultiplex Reads (![]() )
)
Select one or more sequence lists as input. When you click on the button labeled Next, you can then specify the details of how the demultiplexing should be performed.
Defining the read structure
The 'Define tags' wizard contains three buttons, which are used to Add, Edit, and Delete the tags that describe the structure of the reads and how the barcode is embedded in the sequences.
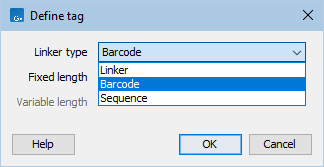
Click on Add to define the first tag. This will bring up the 'Define tag' dialog (figure 28.18).
At the top of the 'Define tag' dialog, you can choose the type of tag you wish to define:
- Linker. The linker (also known as adapter) is a sequence which should just be ignored - it is neither the barcode nor the sequence of interest. In the example in figure 28.17, the linker is two nucleotides long. For this, you simply define its length - nothing else.
- Barcode. The barcode (also known as index) is the stretch of nucleotides used to group the sequences. For this, you simply define the barcode length. The valid sequences for your barcodes are provided in the 'Set barcode options' wizard step, see below.
- Sequence. Defines the sequence of interest. You can define a length interval for how long you expect this sequence to be. The sequence part is the only part of the read that is retained in the output. Both barcodes and linkers are removed.
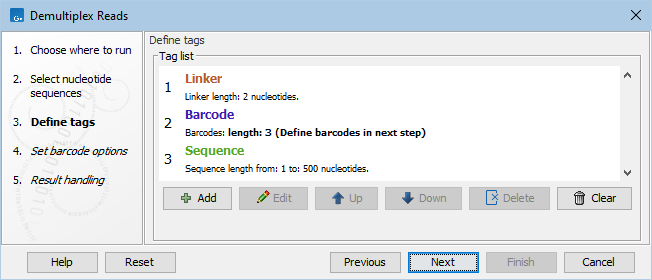
Figure 28.19: Processing the tags as shown in the example of figure 28.17.
If the input contains paired reads, there are two wizards for defining the read structure: 'Define tags' for R1 and 'Define tags (mate)' for R2. If the two reads in the read pair have different barcodes such as illustrated in figure 28.20, the read structure would look like this:
R1 : -Linker1-Barcode1-Sequence
R2 : -Linker2-Barcode2-Sequence

Figure 28.20: Paired reads with linkers and barcodes originating from two different samples.
Defining the barcodes
Click Next to set the barcode options (figure 28.21).
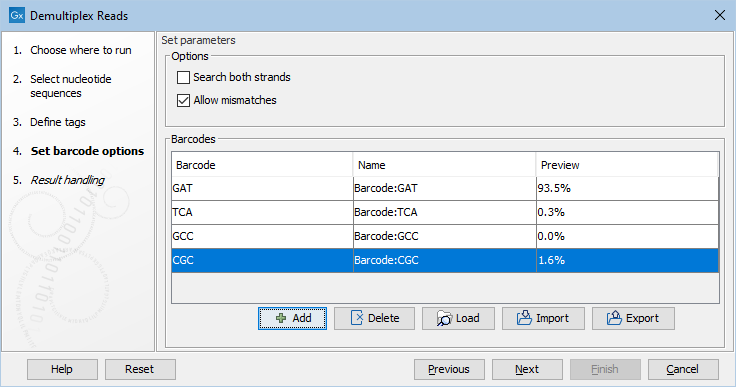
Figure 28.21: Defining the barcodes.
At the top, you can choose to search on both strands for the barcodes.
You can also choose to allow mismatches: only one per barcode will be allowed, regardless of whether the barcodes are on the same read, or distributed on both R1 and R2. Note that if a sequence is one mismatch away from two barcodes, it will not be assigned to either of them.
Barcodes can be provided in several ways:
- Manually enter barcodes. Click the Add (
 ) button, see figure 28.22.
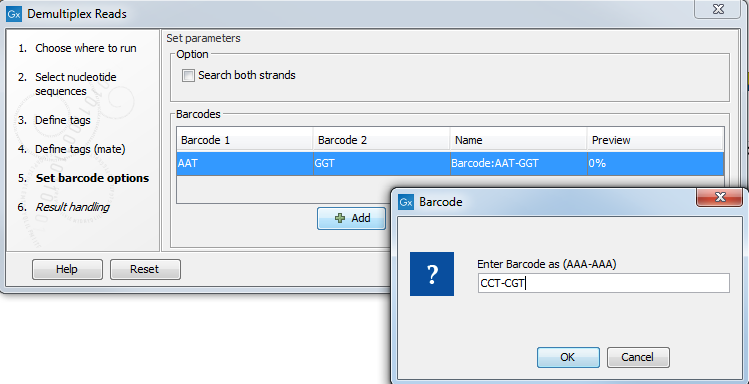
Figure 28.22: The barcodes for the set of paired end reads for sample 1 have already been defined and the barcodes for sample 2 is being entered in the format AAA-AAA, which corresponds to Barcode1-Barcode2 for sample 2 in the example shown in figure 28.20. - Load barcodes from a table element. Click the Load (
 ) button. The first two columns in the table element must contain the expected barcodes and their names, respectively. For example:
Barcode Name AAAAAA Sample1 GGGGGG Sample2 CCCCCC Sample2 - Import barcodes from CSV or Excel format files. Click on the Import (
 ) button. The first two columns in the file containing barcodes must contain the expected barcodes and their names, respectively. Any additional columns will be ignored. An acceptable CSV formatted file could look like:
"AAAAAA","Sample1" "GGGGGG","Sample2" "CCCCCC","Sample3"
A preview of results (figure 28.21) based on 10,000 reads is presented. With a single input, the preview is based on the first 10,000 reads. When multiple inputs are provided, the 10,000 reads are take from across the inputs, with the contribution from each input being proportional to the relative size of that input.
If you would like to change the name of the barcode(s), this can be done by double-clicking on the specific name that you would like to change, see figure 28.23.
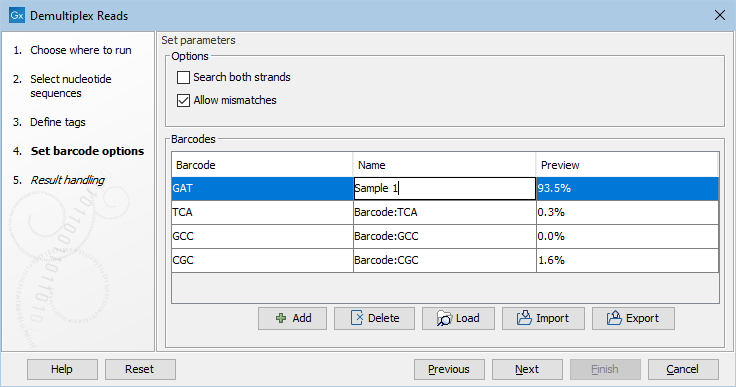
Figure 28.23: The sequence can be renamed by double-clicking on the name.

