How to run Reassemble Regions
The use of the Reassemble Regions tool is best demonstrated with an example. Figure 9.1 illustrates a region with a small gap and only one read spanning the region around the gap.
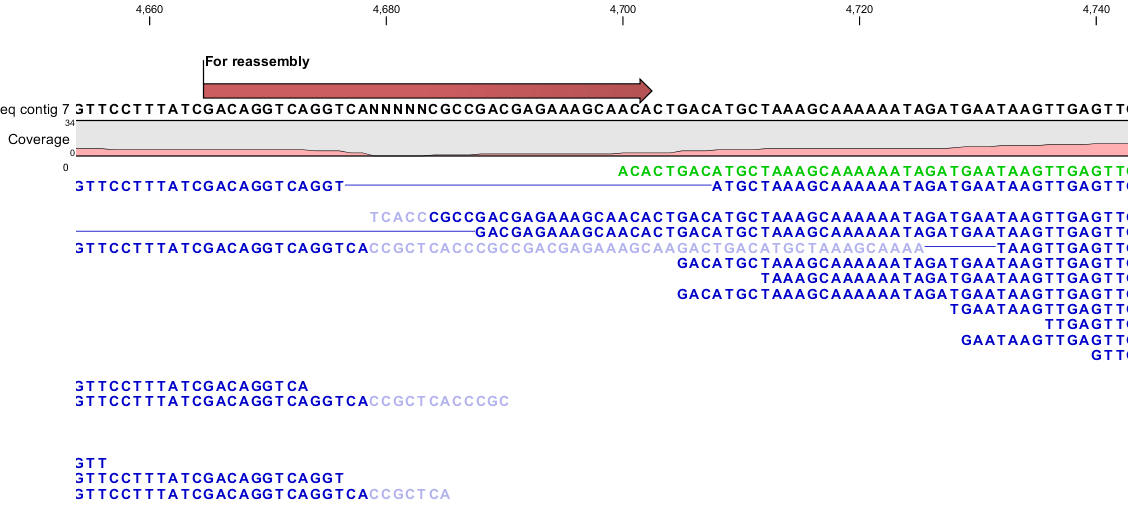
Figure 9.1: Region with a gap that potentially can be closed with the Reassemble Region tool.
However, this single read contains sequencing errors and the region would be impossible to assemble for the de novo assembler. To use the Reassemble Regions tool start out by marking a region around the area to reassemble, right click and assign an annotation to the selected region by clicking Add annotation. The annotation will be used to define the region to reassemble if using the wizard driven version of the Reassemble Region tool. Alternatively it is possible to click on the selected sequence and select Reassemble. In both cases the reassemble tool will autonomously expand the region used for reassembly, which further will be highlighted with an annotation.
Reassemble Regions can be launched from:
Tools | Genome Finishing Module (![]() ) |
Reassemble Regions (
) |
Reassemble Regions (![]() )
)
This opens the dialog shown in figure 9.2.
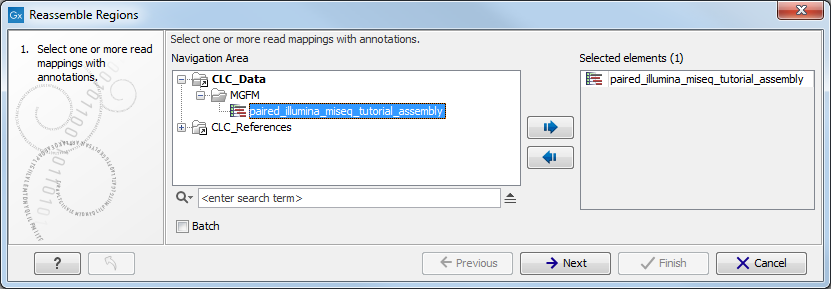
Figure 9.2: Select the annotated read mappings to reassemble.
Next, select annotations for the regions to reassemble by clicking on the (![]() ) (figure 9.3). Click Finish.
) (figure 9.3). Click Finish.
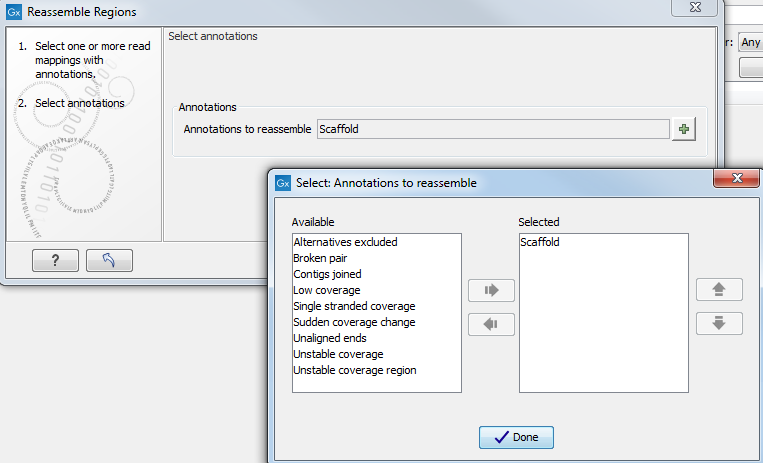
Figure 9.3: Select annotations to consider for reassembly.
If the Reassemble Region tool has been capable of solving the problem, the sequence will now be reassembled as shown in figure 9.4. If the Reassemble Region tool was incapable of correcting the problem the black pop-up box will announce this and the sequence will remain unchanged.
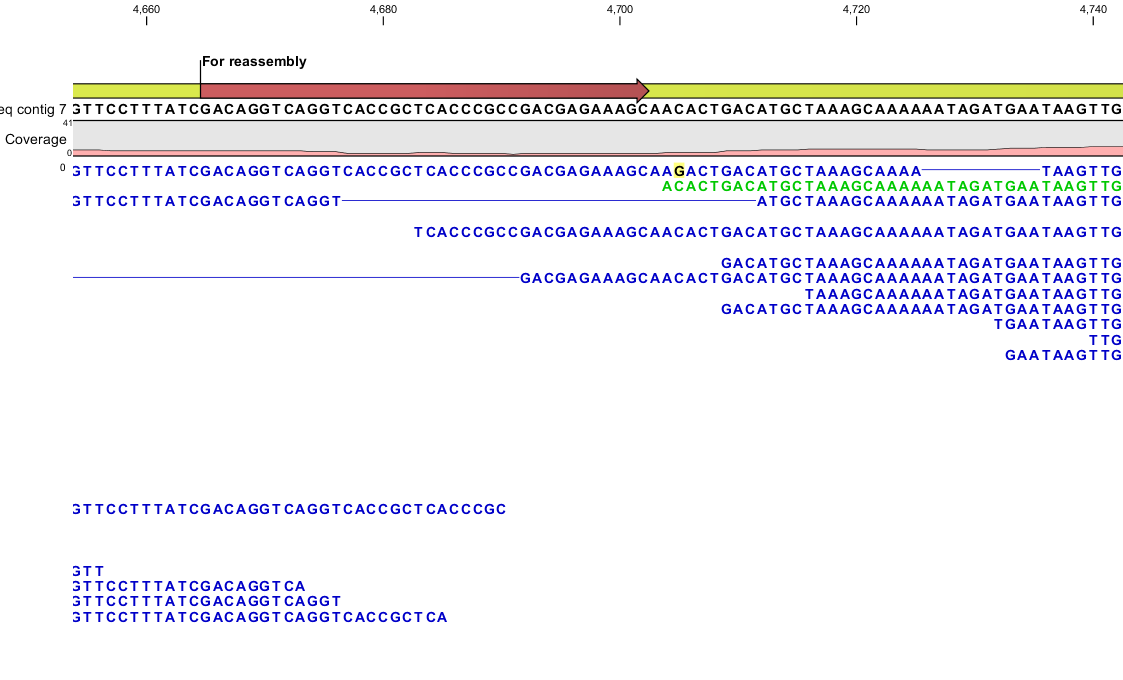
Figure 9.4: The region from figure 9.1 after reassembly.