How to run the Map to Specified Reference workflow on a batch of samples:
To be able to run multiple sample data sets in batch mode, the user must initially make a copy of the template workflow, specify a Result Metadata Table and save the copy of the workflow in the Navigation Area before running it.
- Select the workflow Map to Specified Reference in the toolbox, right-click on the name and choose the option Open Copy of Workflow (figure 10.9).
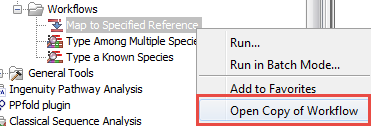
Figure 10.9: Open a copy of a workflow. - This opens a copy of the workflow in the view area of your workbench. Double click on the green tile representing the Result Metadata Table input file (highlighted in red in figure 10.10).
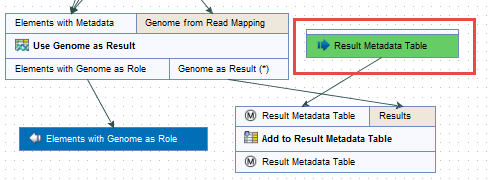
Figure 10.10: Double click on the green Result Metadata Table input file tile (highlighted in red). - It opens a window where you specify the Result Metadata Table created as specified in the Preliminary steps to running a workflow section (figure 10.11). Click on Finish.
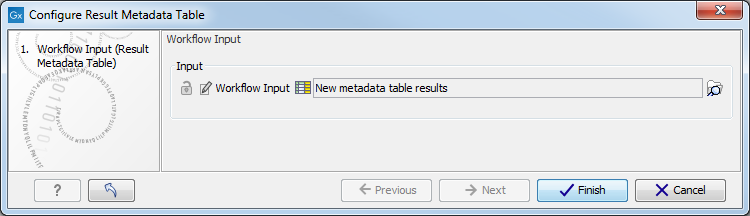
Figure 10.11: Specify the Result Metadata Table you created for running this workflow (here called New metadata table results. - Save the workflow in your Navigation Area by pressing ctrl+S or by right-clicking on the tab and selecting File | Save as followed by the file location of your choice. Alternatively, you can also simply drag the tab to the relevant location in your Navigation Area.
- You can now click on the button Run at the bottom of the copy of the workflow in the View Area (highlighted in red in figure 10.12).
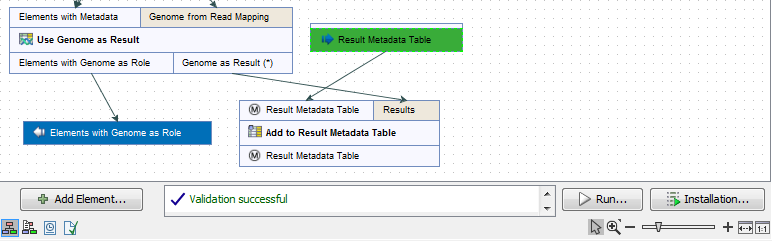
Figure 10.12: Open the copy of the workflow from the Navigation Area and start running it by clicking on the button labeled Run at the bottom of the View Area. - Check the option Batch (highlighted in red in figure 10.13) before selecting several items (samples or folder(s) of samples) to be analyzed. Click Next.
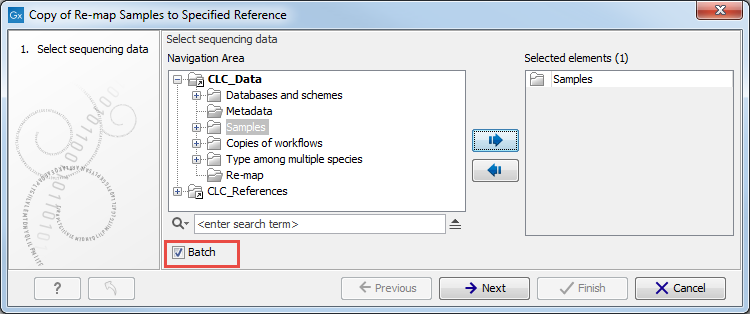
Figure 10.13: Rememeber to tick the button labeled Batch at the bottom of the wizard window before selecting the folders containing the samples you want to analyze. - The next wizard window gives you an overview of the samples present in the selected folder(s). Choose which of these samples you actually want to analyze in case you are not interested in analyzing all the samples from a particular folder (figure 10.14).
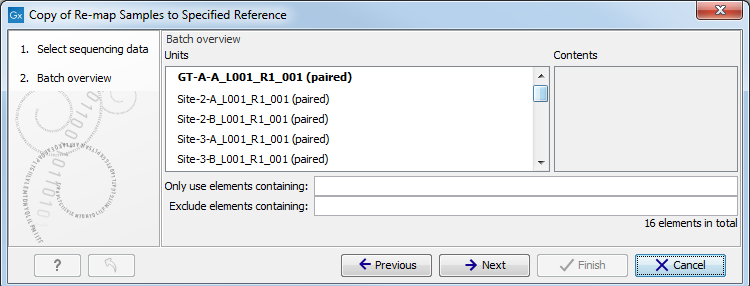
Figure 10.14: Choose which of the samples present in the selected folder(s) you want to analyze. - In the third wizard window, you can see that the Result Metadata Table you specified earlier is already selected. Check that it is indeed the Result Metadata Table you intended to use and click Next.
- The rest of the workflow is similar to the one described in the How to run the Map to a Specified Reference workflow for a single sample section. Refer to this section to understand what parameters can be set, and which outputs are generated.
- In the last Result Handling window, we recommend saving the results in separate folders.