Ordering inputs
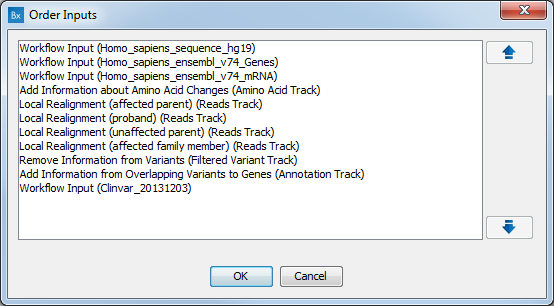
Two different ways to order workflow inputs are available. In both cases, an Order Inputs dialog like that shown in figure 13.12 is used. An item is moved up and down in the list by selecting it and clicking on the up or down arrow on the right.
Workflow inputs can be ordered by using:
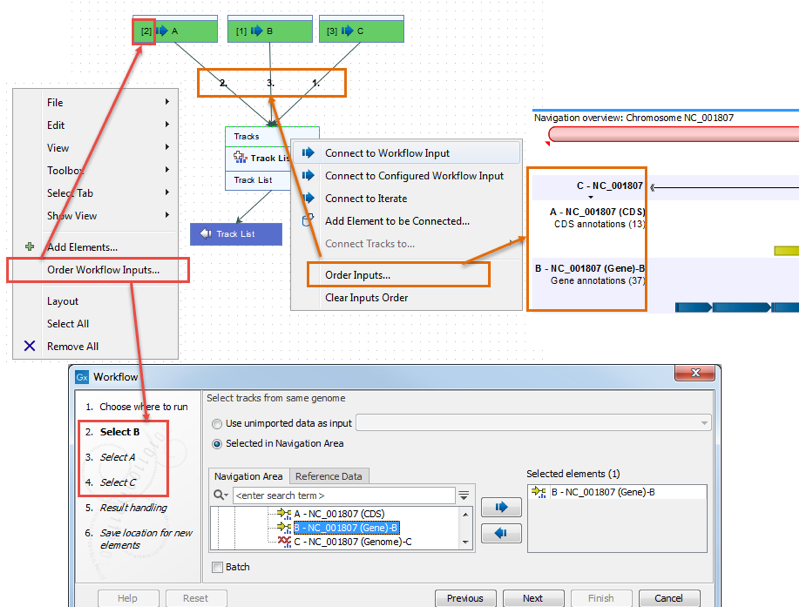
- Order Workflow Inputs.... Right click on any blank area on the Workflow Editor canvas to bring up a menu with this option. This sets the order of the wizard steps prompting for the relevant input data when the workflow is launched. This ordering is reflected by a number in front of the Workflow Input element name in the workflow design. That number can also be used when configuring output element naming patterns, as described in Configuring Workflow Output and Export elements.
- Order Inputs.... Right click on an input channel with more than one connection to it to bring up a menu with this option enabled. This is the order that inputs to this input channel should be processed. This ordering is reflected by a number on the arrow connecting to the input channel. This is particularly useful when considering data visualization. For example, when connecting inputs to a Track List element, this is the order the constituent tracks will be in. This is described further in Track lists as workflow outputs.
See figure 13.13 for an illustration of the effects of these 2 ordering methods.

Figure 13.12: The Order Inputs dialog is used to specify the ordering of workflow inputs.

Figure 13.13: Two levels of input ordering are available. Using Order Workflow Inputs..., the order that inputs are prompted for in the wizard was set to B, A, C. Using Order Inputs..., the order the inputs were processed was set to C, A, B. Here, this means the tracks will appear in the Track List in the order C, A, B.
