Download and configure reference data
The first time you open Biomedical Genomics Workbench you will be presented with the dialog box shown in figure 12.2, which informs you that data are available for download either to the local or server CLC_References repository. If you check the "Never show this dialog again" then subsequently you will only be presented with the dialog box when updated versions of the reference data are available.
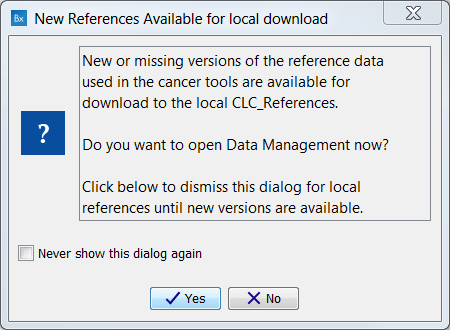
Figure 12.2: Notification that new versions of the reference data are available.
Click on the button labeled Yes. This will take you to the wizard shown in figure 12.3.
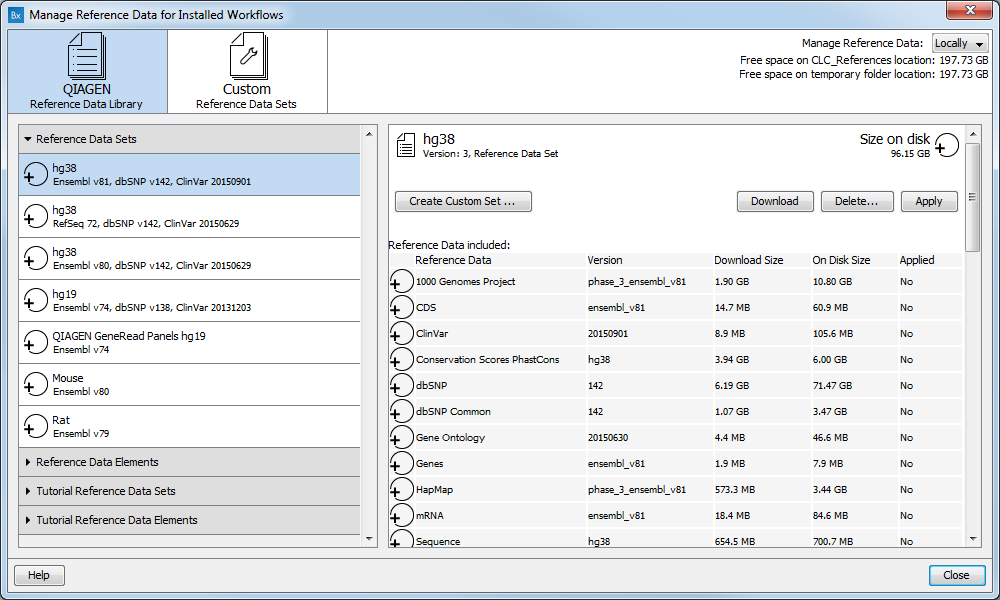
Figure 12.3: The Manage Reference Data wizard gives access to the reference data that are required to be able to run the ready-to-use workflows.
This wizard can also be accessed from the upper right corner of the Biomedical Genomics Workbench by clicking on Data Management (![]() ) (figure 12.4).
) (figure 12.4).
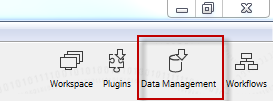
Figure 12.4: Click on the button labeled "Data management" to open the "Manage Reference Data" dialog where you can download and configure the reference data that are necessary to be able to run the ready-to-use-workflows.
The "Manage Reference Data" wizard gives access to all the reference data that are used in the ready-to-use workflows and in the tutorials. From the wizard you can download and configure the reference data.
In the upper part of the wizard you can find two tiles called "QIAGEN Reference Data Library" (![]() ) and "Custom Reference Data Sets" (
) and "Custom Reference Data Sets" (![]() ).
).
On the left hand side, you can use the drop-down menu to choose where you want to manage the reference data. If you choose "Locally", the Download, Delete and Apply buttons will work on the local reference data. If you choose "On Server" (only available if you are connected to the server), the buttons will work on the reference data on the server you are connected to(figure 12.5).

Figure 12.5: Reference data can be available locally or on the server.
You can also check how much free space is available for the Reference folder on your local disk or on the server. The drop-down menu also allows you to check which datasets have been downloaded locally or on the server. You can see this in the left panel of the reference data manager.
When on the "QIAGEN Reference Data Library" tile, we can see the list of all available references data under 4 headers: Reference Data Sets, Reference Data Elements, Tutorial Reference Data Sets and Tutorial Reference Data Elements. Two icons indicate whether you have already downloaded your data in your Reference folder (![]() ) or not (
) or not (![]() ).
).
When selecting a reference set or an element, the window on the right show the size of the folder as well as some complementary information about the reference database. For Reference Data Sets, a table recapitulates the elements included in the set with their version number and respective size, as well as a list of the workflows affected by the set.
Here is the list of the Reference Data Sets and their approximate size: Reference Data Sets
- hg38 96 GB with Ensembl v81, dbSNP v142, ClinVar 20150901
- hg38 88 GB with Ensembl v80, dbSNP v142, ClinVar 20150629
- hg19 63 GB with Ensembl v74, dbSNP v138, ClinVar 20131203
- QIAGEN Gene Reads Panels hg19 8 MB with Ensembl v74
- Mouse 15 GB with Ensembl v80
- Rat 5.5 GB with Ensembl v79
Tutorial Reference Data Sets
- chr 5 of hg19 4.5 GB for use with the Identification of Variants in a Tumor Sample tutorial
- chr 14 of hg19 2.3 GB for use with the Copy Number Variant Detection tutorial
- chr 17 of hg19 2 GB for use with the RNA-Seq Analysis of Human Breast Cancer Data tutorial
- chr 21 of hg19 1 GB for use with the ChIP Sequencing tutorial
- chr 22 of hg19 1 GB for use with the Identification of Somatic Variants in a Matched Tumor-Normal Pair tutorial
Each Reference Data Set is made of a compilation of Reference Data Elements. Downloading sets will automatically download the elements the set is made of, but you can also download elements individually under the Reference Data Elements folder. Note that data for hg19 is available for the whole genome as well as for individual chromosome 5, 14, 17, 21 and 22.
- For homo sapiens
- Sequence hg38
- Sequence hg19 (whole genome and chromosome specific)
- dbSNP 142
- dbSNP 138 (whole genome and chromosome specific)
- dbSNP Common 142
- dbSNP Common 138 (whole genome and chromosome specific)
- Hapmap phase_3_ensembl_v80, Hapmap phase_3 (whole genome and chromosome specific)
- Genes ensembl_v80, ensembl_v73, ensembl_v74 (whole genome and chromosome specific)
- Conservation Scores PhastCons hg38
- Conservation Scores PhastCons hg19 (whole genome and chromosome specific)
- ClinVar 20150629 and 20130930 (whole genome and chromosome specific), 20131203 (whole genome and chromosome specific)
- 1000 Genomes Project phase_3 and phase_1 (whole genome and chromosome specific)
- Gene Ontology 20150630 and 20131027 (whole genome and chromosome specific)
- CDS ensembl_v80 and ensembl_v74 (whole genome and chromosome specific)
- mRNA ensembl_v80 and ensembl_v74 (whole genome and chromosome specific)
- Target Regions qiagen_v2.01_hg38, Target Regions qiagen_v2.01 (whole genome and chromosome specific) and qiagen_v2 (whole genome and chromosome specific)
- Target Primers qiagen_v2.01_hg38, qiagen_v2.01 (whole genome and chromosome specific), qiagen_v2 (whole genome and chromosome specific)
- For mus musculus
- CDS ensemb_v80
- Conservation Scores Phastcons mm 10
- dbSNP ensembl_v80
- Gene Ontology 20150630
- Genes ensembl_v80
- mRNA ensembl_v80
- Sequence ensemble_v80
- For rattus norvegicus
- CDS ensemb_v79
- Conservation Scores Phastcons Rnor_5.0
- dbSNP ensembl_v79
- Gene Ontology 20150630
- Genes ensembl_v79
- mRNA ensembl_v79
- Sequence ensemble_v79
Data that has not been downloaded yet is represented by a plus icon (![]() ). Select the set or element you would like to download, and click on the Download button. Once the data is downloading, the Download button fades out and you can check the progress of the downloading in the Processes tab below the toolbox (figure 12.6).
). Select the set or element you would like to download, and click on the Download button. Once the data is downloading, the Download button fades out and you can check the progress of the downloading in the Processes tab below the toolbox (figure 12.6).
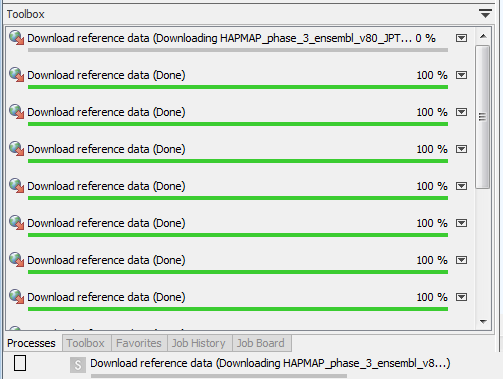
Figure 12.6: Click on the info button to see the legal notice and license information.
Once the reference data has been downloaded, the set or element is marked with a check icon (![]() ).
).
If you have finished downloading the appropriate Reference Data Set, click on the button labeled Apply and the workflows will automatically be configured with all the relevant reference data available. The information in the "Applied" column in the right panel of the reference data manager describes whether the dataset has been applied to the location specified in the drop-down menu. For example, a "Yes" in the "Applied" column when the drop-down menu is set to "On Server" means that the given data will be used from the server, when the affected workflows are run. This will be the case even if you choose execute the workflow locally (i.e. in the workbench). If the "Applied" column contains "Yes" when the drop-down menu is set to "Locally", this means the given data will be used from the local reference folder, when the affected workflows are run. This means that you will not be able to execute these workflows on the server (figure 12.7).
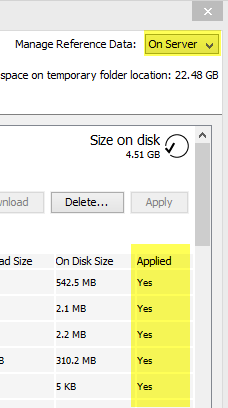
Figure 12.7: Check where your reference data is applied by looking at the column "Applied" in the data set description.
For references like the "1000 Genomes Project" and "HapMap" databases which contain more than one reference data file, the workflow will initially be configured with all the populations being available and you will be able to specify which reference data to use in the workflow wizard directly.
But you can also modify a pre-existing Reference Data Set to contain only the population you want to work with. In the Data Management wizard, select the Reference Data Set you are interested in, click on Create Custom Set. Select the version of the 1000 genomes or Hapmap database you wish to work with (figure 12.8).
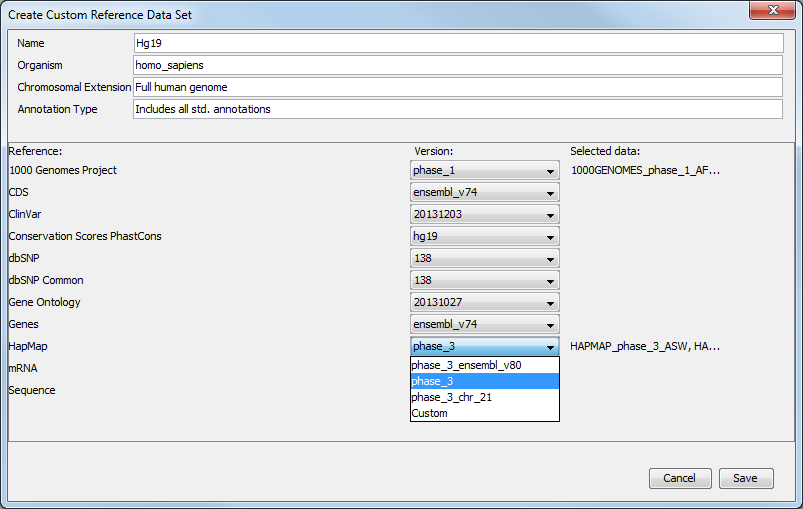
Figure 12.8: Select the version of the 1000 genomes or Hapmap database you want to work with, or select the option "custom".
A pop-up window will open where you can select the population you want to work with. Alternatively, click on the option "custom" in lieu of version and choose from the CLC_References folder the population of your choice (figure 12.9).
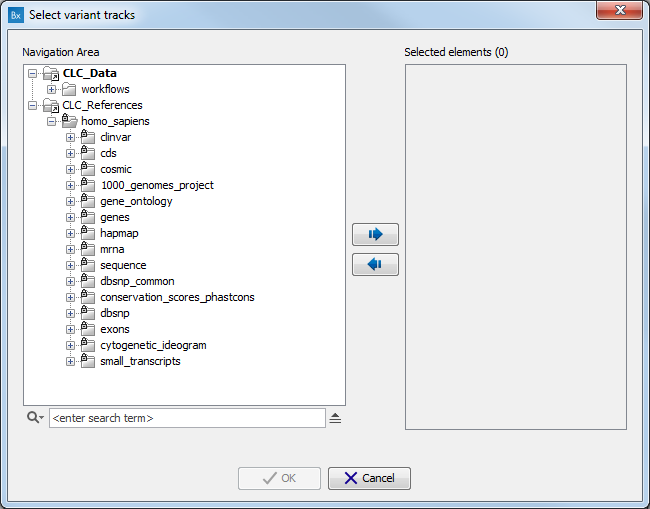
Figure 12.9: Select the version of the 1000 genomes or Hapmap database you want to work with, or select the option "custom".
Three letter codes are used to specify the population that the different reference data origin from (e.g. ASW = American's of African Ancestry in SW USA). For the phase 3 HapMap population codes, please see http://www.sanger.ac.uk/resources/downloads/human/hapmap3.html and for the 1000 Genomes Project see http://www.ensembl.org/Help/Faq?id=328.
The Delete button allows user to delete locally installed reference data, whereas only administrators are capable of deleting reference data installed on the server. This can be used if you suspect that a downloaded reference is corrupt, and needs to be re-downloaded, or if you need to clean up space, e.g. locally.
Note: Custom reference data sets specific to the workbench on which they are created, and will not appear in other workbenches connected to the same server.
At the bottom of the wizard you can find:
- A button "Help" button that links to the section in the Biomedical Genomics Workbench reference manual that describes the "Manage Reference Data" button.
- A Create Custom Set ... button that allows you to create your own set of reference data from an existing data Sets. Clicking on this button will open a window (figure 12.10) where you can edit the name of the data set, the organism it represents, the chromosomal extension, and the annotation types used. For each type of reference, a drop-down menu allows you to choose from the different versions available, as well as from a custom database. This is useful when you have your own version of the reference data that you have imported in the workbench and that you would like to use rather than the currently available Reference Data Sets. The customs data sets are saved under the Custom Reference Data Sets tile. Do not forget to click on the button Apply if you wish to use this set for your workflows.
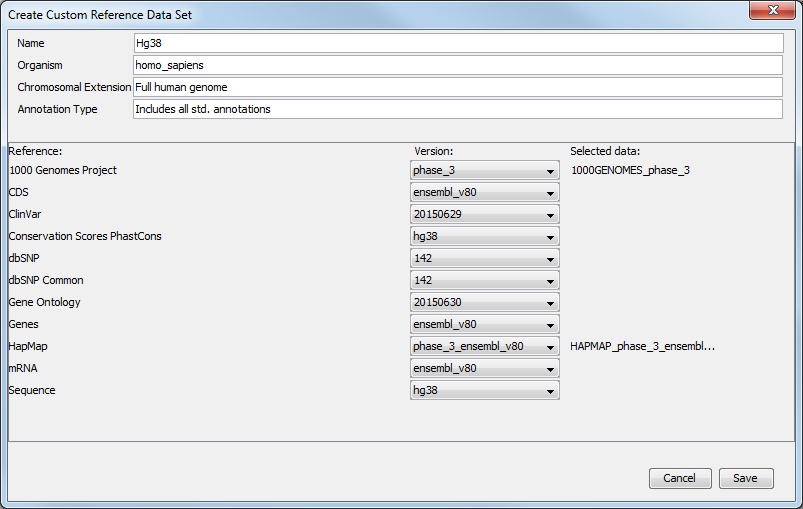
Figure 12.9: Select the reference data elements you want to add to you custom reference data set. - A button labeled "Close". Click on this to close the wizard.
