Submitting samples for analysis
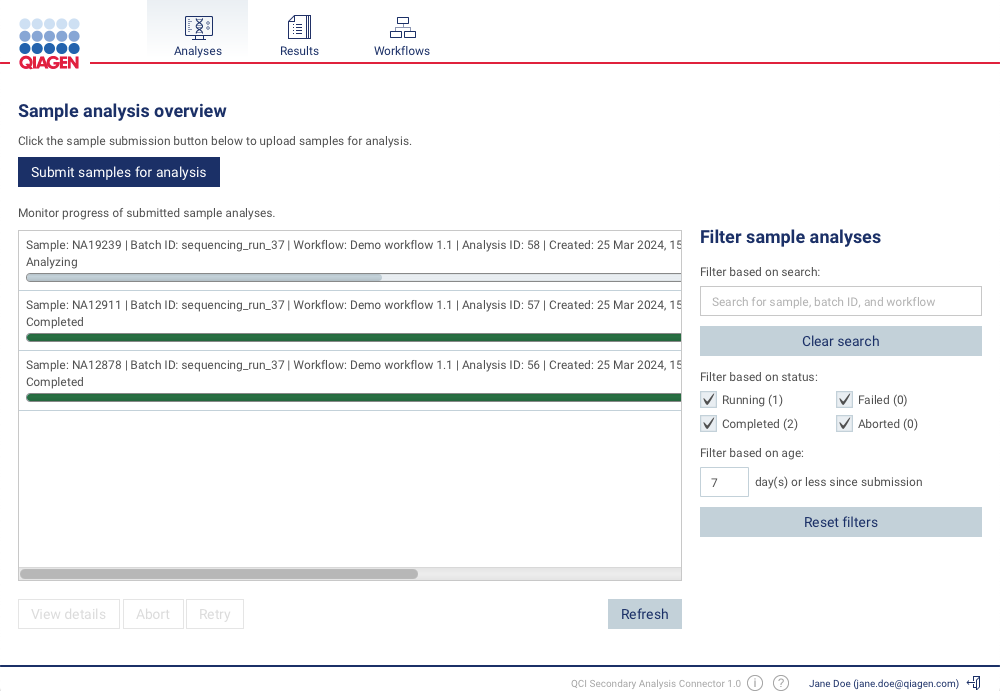
The sample submission process is started by clicking the Submit samples for analysis button on the Analyses tab seen in figure 3.3.
Selecting the analysis workflow and the sample files to analyze
Clicking the Submit samples for analysis button will open a dialog for selecting:
- The secondary analysis workflow you wish to apply to your samples.
- The sample files that should be submitted for analysis.
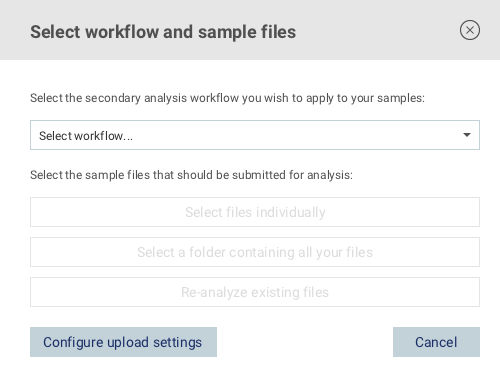
Figure 3.4: Dialog for selecting secondary analysis workflow and sample files
There are three options for selecting the sample files that should be analyzed:
- Select files individually:
- Some secondary analysis workflows require submission of the sample sheet that was used to generate the sample files (see Definition of sample grouping for information about sample sheet grouping). To submit samples to these workflows, click this button and select the sample sheet on your file system. The sample files belonging to the sample sheet must be located within the same folder tree as the sample sheet in order to be detected by the connector.
Note: You will be notified by QIAGEN if your workflow requires submission of a sample sheet.
- For workflows that do not require sample sheets, this button can be used to submit individual samples instead of an entire sequencing run by selecting only the sample files you wish to submit.
- Some secondary analysis workflows require submission of the sample sheet that was used to generate the sample files (see Definition of sample grouping for information about sample sheet grouping). To submit samples to these workflows, click this button and select the sample sheet on your file system. The sample files belonging to the sample sheet must be located within the same folder tree as the sample sheet in order to be detected by the connector.
- Select a folder containing all your files:
- Use this button if you wish to submit all sample files located within a given folder tree.
- Import samples from cloud storage:
- Use this button if you wish to import samples from one of the configured cloud accounts (see Configuring cloud accounts).
Note: During sample submission, the connector automatically retries uploading sample files for up to 24 hours if the upload is interrupted (for example, due to temporary loss of internet connectivity). Upload will only be marked as failed if all retry attempts are exhausted.
Preparing the sample submission
After selecting the analysis workflow and sample files, a dialog for preparing the sample submission will be displayed (see figure 3.5).
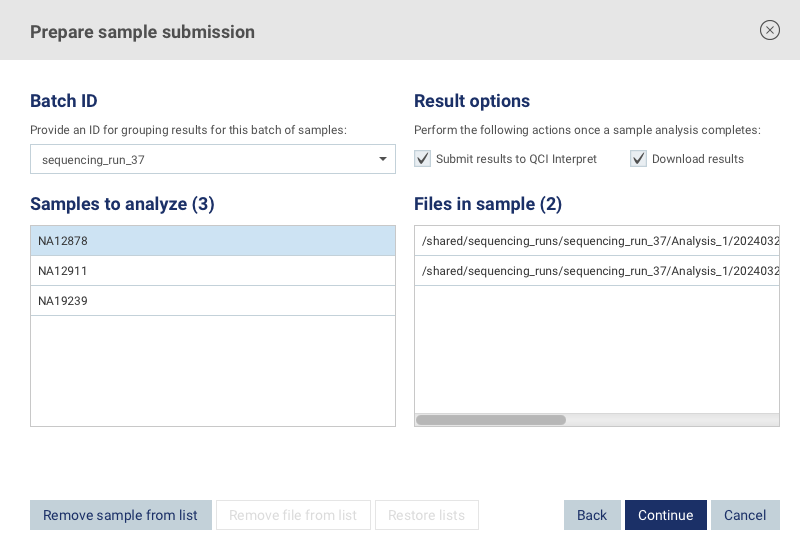
Figure 3.5: Dialog for preparing the sample submission
In this dialog you should:
- Provide a batch ID: An ID for grouping the results for this batch of samples must be provided. It is recommended to use the ID of the sequencing run from which the sample files originate. Expanding the batch ID menu will display a list of suggested IDs. The list consists of all the folder names that form the path to the selected sample files. One of these folder names will typically contain the ID of the sequencing run, as long as the sample files have not been moved out of the output location of the sequencing machine.
- Select if the analysis results should be automatically submitted to QCI Interpret once a sample analysis completes. If you would prefer to inspect the analysis results before submitting them to QCI Interpret, you can leave this setting disabled and submit the results manually after the inspection (see Submitting results to QCI Interpret).
- Select if the analysis results should be automatically downloaded once a sample analysis completes. The download location, a file type filter, and the creation of a download completion file can be configured in the download settings dialog (see Configuring download settings).
- Select if the analysis results should be automatically exported to one of the configured cloud accounts once a sample analysis completes. The export location, a file type filter, and the creation of an export completion file can be configured in the export settings dialog (see Configuring cloud export settings).
- Curate the list of detected samples: The samples that were detected based on your file selection in the previous step are displayed in the dialog. Selecting a given sample will display which sample files it contains. The list of samples to analyze and the files in a given sample can be modified by using the buttons in the bottom of the dialog. A warning will be displayed if there are issues with any of the samples, for example if any of the sample files contain unsupported characters in the filename (only letters, digits, dashes, underscores, and dots are allowed).
Confirming the sample submission
The final step of the sample submission process is a confirmation dialog that lists details about the sample submission (see figure 3.6).
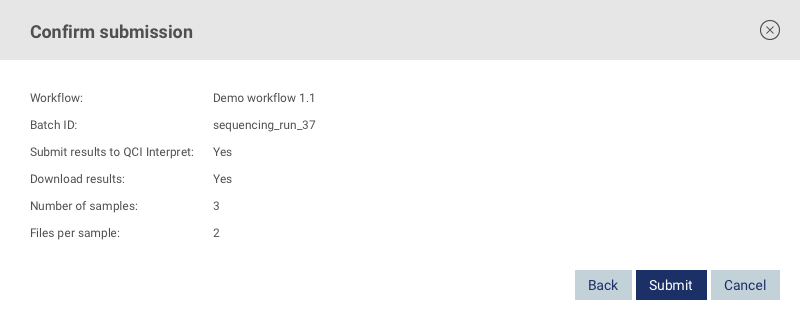
Figure 3.6: Dialog for confirming the sample submission