User authentication using the web interface
After the CLC Server has been installed and is running, log into the CLC Server root account. If you have not already changed the password for the root user, see Logging in the first time and changing the root password
Then specify the user authentication mechanism to use by clicking on the Authentication mechanism heading under:
Configuration (![]() ) | Authentication (
) | Authentication (![]() )
)
The modes of authentication available are shown in figure 4.2.
If LDAP or Active Directory is selected, a settings panel is revealed, where the details of the integration are entered.
Members of a group specified as an administrative group with login rights to the CLC Server are able to configure and manage the CLC Server. For the built-in authentication method, this means adding particular users to the built-in admin group. For Active Directory or LDAP, this means designating a group in the box labeled Admin group name and adding any users who should be administrators of the CLC Server to this group.
As well as specifying locations used to store data, members of the administration group will be able to specify which areas should have permissions enabled, and to set specific permissions on particular folders, as described in Access privileges and permissions.
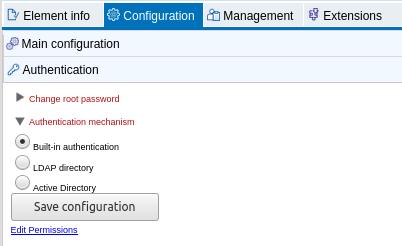
Figure 4.2: Three modes of user authentication are available. Clicking on the Edit Permissions link at the bottom opens up the Permissions tab, where access to the CLC Server and its functionality can be configured, as described in Controlling access to the server, server tasks and external data.
Subsections