Page setup
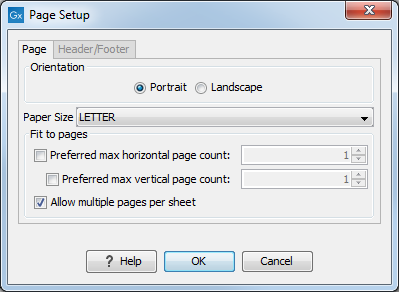
No matter whether you have chosen to print the visible area or the whole view, you can adjust page setup of the print. An example of this can be seen in figure 4.5
In this dialog you can adjust both the setup of the pages and specify a header and a footer by clicking the tab at the top of the dialog.
You can modify the layout of the page using the following options:
- Orientation.
- Portrait. Will print with the paper oriented vertically.
- Landscape. Will print with the paper oriented horizontally.
- Paper size. Adjust the size to match the paper in your printer.
- Fit to pages. Can be used to control how the graphics should be split across
pages (see figure 4.6 for an example).
- Horizontal pages. If you set the value to e.g. 2, the printed content will be broken up horizontally and split across 2 pages. This is useful for sequences that are not wrapped
- Vertical pages. If you set the value to e.g. 2, the printed content will be broken up vertically and split across 2 pages.

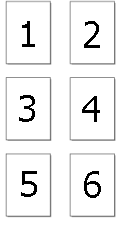
Figure 4.6: An example where Fit to pages horizontally is set to 2, and Fit to pages vertically is set to 3.
Note! It is a good idea to consider adjusting view settings (e.g. Wrap for sequences), in the Side Panel before printing. As explained in Printing, the printed material will look like the view on the screen, and therefore these settings should also be considered when adjusting Page Setup.
Header and footer
Click the Header/Footer tab to edit the header and footer text.
By clicking in the text field for either Custom header text or
Custom footer text you can access the auto formats for
header/footer text in Insert a caret position. Click either
Date, View name, or User name to include the auto format
in the header/footer text.
Click OK when you have adjusted the Page Setup. The settings are saved so that you do not have to adjust them again next time you print. You can also change the Page Setup from the File menu.

