Assemble and create isolate
An isolate is created by selecting a number of sequences/sequencing data and an MLST scheme.
To create an isolate:
Multilocus Sequence Typing (![]() ) |
Assembly and Create Isolate (
) |
Assembly and Create Isolate (![]() )
)
This will bring up a dialog as shown in figure 4.1.
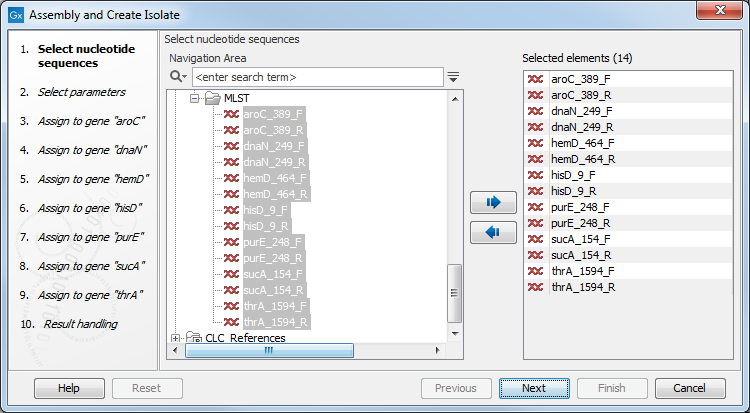
Figure 4.1: Selecting isolate sequences.
In this example, 8 sequences have been selected: a forward and a reverse read for each locus. Even if you do not have sequences for all loci, you can create the isolate and add more sequence later (see Assemble to an existing isolate).
Clicking Next displays the dialog shown in figure 4.2.
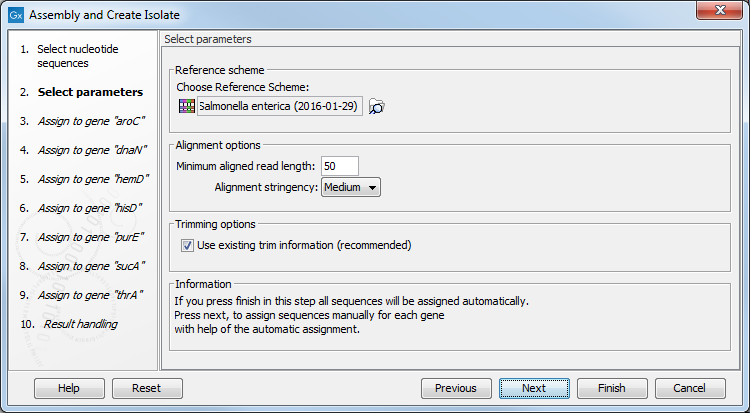
Figure 4.2: Setting a reference scheme for typing the isolate.
At the top of the dialog, you set the MLST scheme to be used for
this isolate by clicking the small button (![]() ). You have to
either create a new scheme or download a scheme and save it in the
Navigation Area before you can create the isolate (see
Handling MLST
schemes on how to create and download
schemes).
). You have to
either create a new scheme or download a scheme and save it in the
Navigation Area before you can create the isolate (see
Handling MLST
schemes on how to create and download
schemes).
Below there are the options regarding assembling the sequences into contigs:
- Minimum aligned read length. The minimum number of nucleotides in a read which must be successfully aligned
to the contig. If this criteria is not met by a read, the read is
excluded from the assembly.
- Alignment stringency. Specifies the stringency of the scoring function used by the alignment step in the contig
assembly algorithm. A higher stringency level will tend to produce
contigs with less ambiguities but will also tend to omit more
sequencing reads and to generate more and shorter contigs. Three
stringency levels can be set: Low, Medium or High.
- Use existing trim information. If you have previously trimmed
(
 ) the sequences, you can select this option to use the
trim information. This is generally not necessary since the
sequences are assembled to a reference sequence from the scheme. If
the contigs in the isolate are not calculated correctly, you can try
to trim the sequences first.
) the sequences, you can select this option to use the
trim information. This is generally not necessary since the
sequences are assembled to a reference sequence from the scheme. If
the contigs in the isolate are not calculated correctly, you can try
to trim the sequences first.
When a scheme has been selected, it provides reference sequences for each of the loci. When you click Next, the CLC MLST Module automatically compares each of your sequences to these reference sequences and if they are homologous, your sequence is assigned to this locus. This eliminates the need for manually selecting which sequences belong to which loci.
The following steps in the dialog traverse through the loci, showing which sequences have been assigned to each locus. An example is shown in figure 4.3 where two sequences are assigned to the dnaN gene (listed to the right).
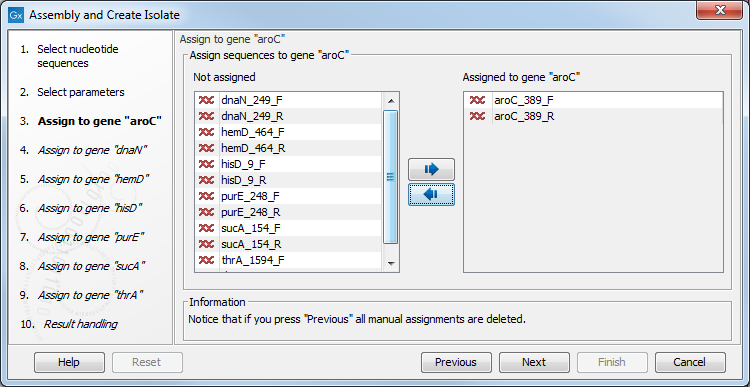
Figure 4.3: Assigning sequences to the dnaN gene.
You can of course manually change which sequences should be assigned
to this locus by using the Add (![]() ) and
Remove (
) and
Remove (![]() ) buttons.
) buttons.
To the left you see the rest of the sequences which have not yet been assigned to a locus. When clicking Next, the CLC MLST Module will try to find sequences matching the reference sequence for the next locus, and so on for all the loci. When clicking Next at each step, only the sequences listed in the left side of the dialog are considered for the automatic assignment.
When you press Finish, the isolate will be created and opened see Working with isolates.
Note! If you press Finish while there are sequences listed to the left, they will not be assigned to a locus. Therefore, you should either click Finish after the second step when you have selected the scheme, or you should wait until you have stepped through all the assignment steps.