User authentication via the Workbench for built-in authentication
This information only applies if built-in authentication is being used. If LDAP or AD is being used, the menus described here will be disabled.
Users and groups can be managed through the Workbench by logging into the CLC Server as an administrative user and then going to the Workbench menu:
File | Manage Server Users and Groups
This will display the dialog shown in figure 5.7.
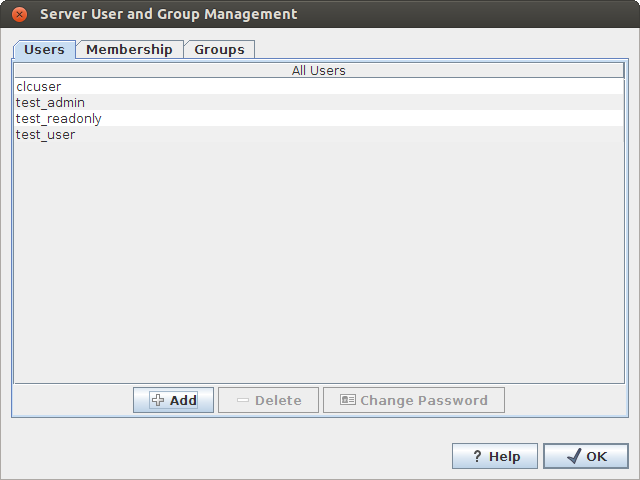
Figure 5.8: Managing server users via a CLC Workbench
Click on the Add (![]() ) button to create a new user. Enter the name of the user and enter a password. You will be asked to re-type the password. If you wish to change the password at a later time, select the user in the list and click Change password (
) button to create a new user. Enter the name of the user and enter a password. You will be asked to re-type the password. If you wish to change the password at a later time, select the user in the list and click Change password (![]() ).
).
To delete a user, select the user in the list and click Delete (![]() ).
).
Access rights are granted to groups, not users, so a user has to be a member of one or more groups to get access to the data location.
Adding and removing groups is done in the Groups tab (see figure 5.8).
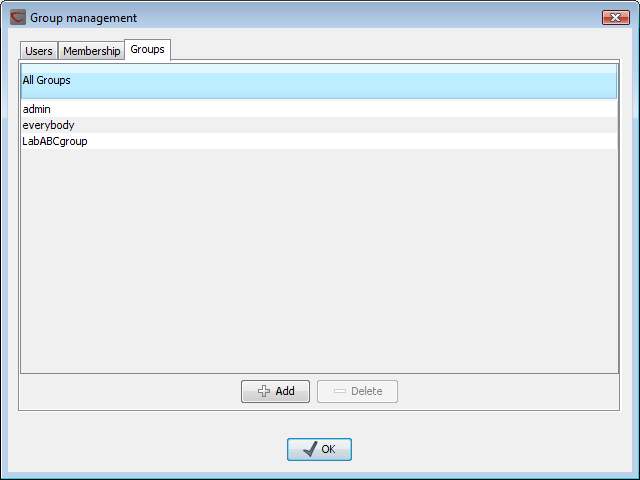
Figure 5.9: Managing server groups via a CLC Workbench
To create a new group, click the Add (![]() ) button and enter the name of the group. To delete a group, select the group in the list and click the Delete (
) button and enter the name of the group. To delete a group, select the group in the list and click the Delete (![]() ) button.
) button.
When a new group is created, it is empty. To assign users to a group, click on the Membership tab. In the Selected group box, you can choose among all the groups that have been created. When you select a group, you will see its members in the list below (see figure 5.9). To the left you see a list of all users.
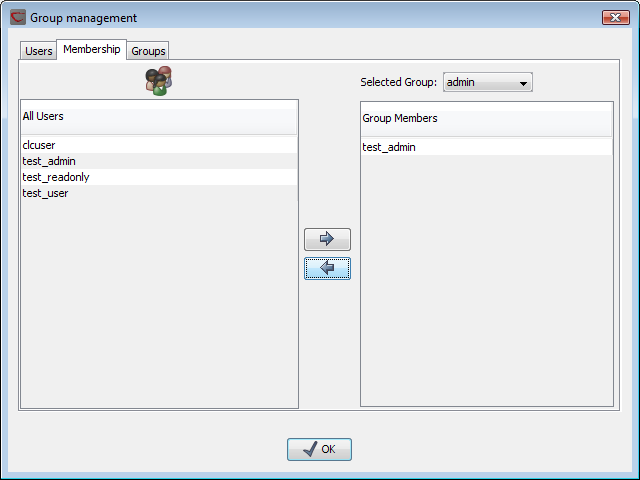
Figure 5.10: Listing members of a group.
To add users to or to remove users from a group, click on the Add (![]() ) or Remove (
) or Remove (![]() ) buttons. To create new users, see Managing users.
) buttons. To create new users, see Managing users.