Installing and configuring workflows
Workflows can be installed using a workflow installer file, or installed directly as the final step when creating a workflow installer in a CLC Workbench. See the CLC Genomics Workbench manual for details.
Installing a workflow on the CLC Server requires relevant permissions.
Workflows installed on the CLC Server are managed using the web client, under:
Extensions (![]() ) | Manage Workflows (
) | Manage Workflows (![]() )
)
Installing workflows
Click on the Install Workflow button to open a dialog for installing a workflow (figure 10.1).
After installation, the workflow will be listed in the table. A green checkmark (![]() ) in the Status column indicates that no problems have been identified and the workflow is ready to use.
A red exclamation mark (
) in the Status column indicates that no problems have been identified and the workflow is ready to use.
A red exclamation mark (![]() ) in the Status column means that there is an issue that should be attended to (figure 10.1). Clicking an exclamation mark opens a dialog with information about the problem (figure 10.2).
) in the Status column means that there is an issue that should be attended to (figure 10.1). Clicking an exclamation mark opens a dialog with information about the problem (figure 10.2).
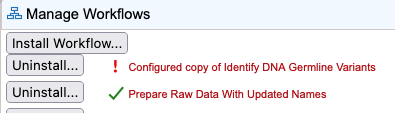
Figure 10.1: Two workflows are installed on the CLC Server. Based on the information in the Status column, one is valid and ready to use (green checkmark) , while a problem has been identified with the other (red exclamation mark).
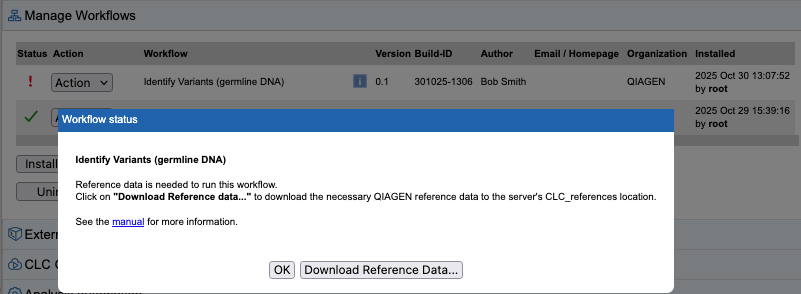
Figure 10.2: Clicking the red exclamation mark for the Identify Variants (germline DNA) workflow opened this dialog with details about the workflow status. Here, the workflow is configured to use reference data that is not available the CLC Server's CLC_References location yet.
Note: Workflows with a red exclamation mark (![]() ) in the Status column are still available to launch from the CLC Workbench Workflows menu, and using the CLC Server Command Line Tools. If the problem is missing reference data, it may be possible to successfully run the workflow from a CLC Workbench depending on the workflow design. In such cases, a launch wizard step will support the selection of a Reference Data Set, and the option to download any elements not yet in the CLC_References location.
) in the Status column are still available to launch from the CLC Workbench Workflows menu, and using the CLC Server Command Line Tools. If the problem is missing reference data, it may be possible to successfully run the workflow from a CLC Workbench depending on the workflow design. In such cases, a launch wizard step will support the selection of a Reference Data Set, and the option to download any elements not yet in the CLC_References location.
Managing installed workflows
Actions that can be taken for each installed workflow are listed in drop-down menus under the Action column (figure 10.3).
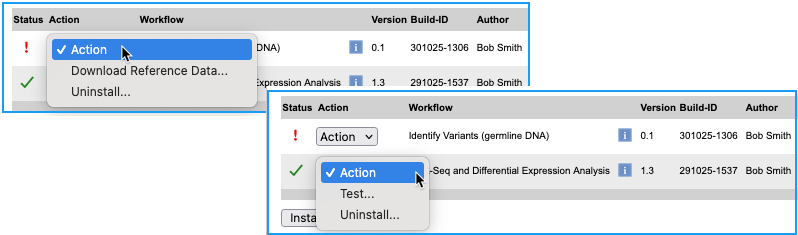
Figure 10.3: A drop-down menu of relevant actions is available for each installed workflow.
Common actions include:
- Uninstall...
- Uninstall the workflow. (Present for all workflows.)
- Test...
- Launch a test run of the workflow. (Present for valid workflows.)
- Update...
- Update the versions of tools in a workflow to match the tool versions present on the CLC Server. (Present for workflows that can be updated directly.)
- Download Reference Data...
- Open a "Download reference data" dialog to download any QIAGEN reference data required for the workflow. (Present for workflows requiring QIAGEN reference data not yet available in a CLC_References File System Location.)
An Uninstall all... button under the table allows all workflows to be uninstalled at the same time.