Show enzymes cutting inside/outside selection
Manage
enzymes describes how to add more enzymes to
the list in the Side Panel based on the name of the enzyme,
overhang, methylation sensitivity etc. However, you will often find
yourself in a situation where you need a more sophisticated and
explorative approach.
An illustrative example: you have a selection on a sequence, and you wish to find enzymes cutting within the selection, but not outside. This problem often arises during design of cloning experiments. In this case, you do not know the name of the enzyme, so you want the Workbench to find the enzymes for you:
right-click the selection | Show Enzymes
Cutting Inside/Outside
Selection (![]() )
)
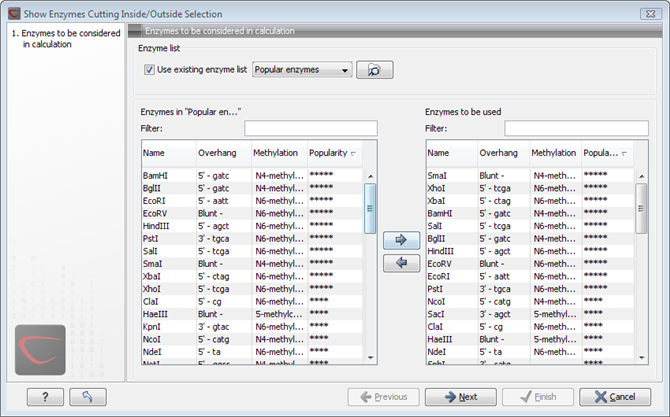
This will display the dialog shown in figure 20.34 where you can specify which enzymes should initially be considered.

Figure 20.34: Choosing enzymes to be considered.
At the top, you can choose to Use existing enzyme list. Clicking this option lets you select an enzyme list which is stored in the Navigation Area. A list of popular enzymes is available in the Example Data folder you can download from the Help menu.
Below there are two panels:
- To the left, you can see all the enzymes that are in the list selected above. If you have not chosen to use an existing enzyme list, this panel shows all the enzymes available.
- To the right, you can see the list of the enzymes that will be used.
Select enzymes in the left side panel and add them to the right
panel by double-clicking or clicking the Add button
(![]() ). If you e.g. wish to use EcoRV and BamHI, select these
two enzymes and add them to the right side panel.
). If you e.g. wish to use EcoRV and BamHI, select these
two enzymes and add them to the right side panel.
If you wish to use all the enzymes in the list:
Click in the panel to the left | press Ctrl + A
(![]() + A on Mac) | Add (
+ A on Mac) | Add (![]() )
)
The enzymes can be sorted by clicking the column headings, i.e. Name, Overhang, Methylation or Popularity. This is particularly useful if you wish to use enzymes which produce a 3' overhang. In this case, you can sort the list by clicking the Overhang column heading, and all the enzymes producing 3' overhangs will be listed together for easy selection.
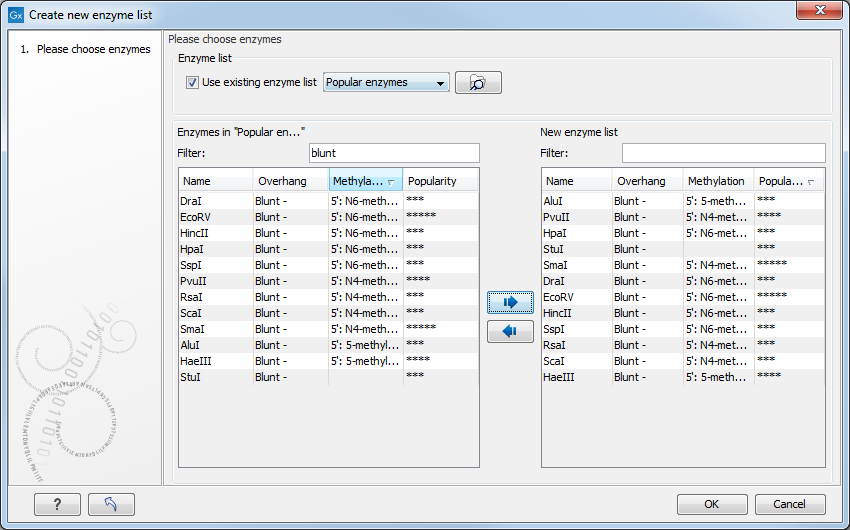
When looking for a specific enzyme, it is easier to use the Filter. If you wish to find e.g. HindIII sites, simply type HindIII into the filter, and the list of enzymes will shrink automatically to only include the HindIII enzyme. This can also be used to only show enzymes producing a blunt cut site as shown in figure 20.50.

Figure 20.35: Selecting enzymes.
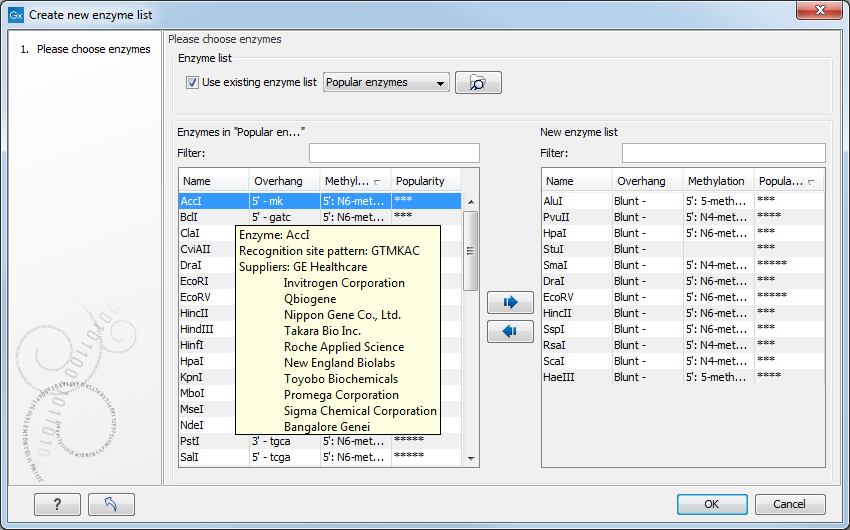
If you need more detailed information and filtering of the enzymes, either place your mouse cursor on an enzyme for one second to display additional information (see figure 20.51), or use the view of enzyme lists (see Restriction enzyme list).

Figure 20.36: Showing additional information about an enzyme like recognition sequence or a list of commercial vendors.
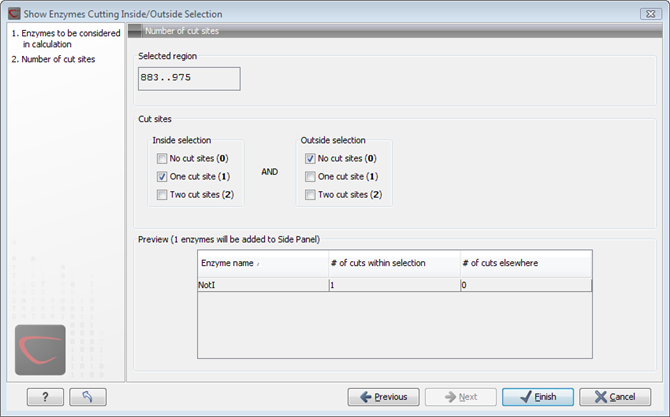
Clicking Next will show the dialog in figure 20.37.

Figure 20.37: Deciding number of cut sites inside and outside the selection.
At the top of the dialog, you see the selected region, and below are two panels:
- Inside selection. Specify how many times you wish the enzyme to cut inside the selection. In the example described above, "One cut site (1)" should be selected to only show enzymes cutting once in the selection.
- Outside selection. Specify how many times you wish the enzyme to cut outside the selection (i.e. the rest of the sequence). In the example above, "No cut sites (0)" should be selected.
If you have selected more than one region on the sequence (using
Ctrl or ![]() ), they will be treated as individual regions. This
means that the criteria for cut sites apply to each region.
), they will be treated as individual regions. This
means that the criteria for cut sites apply to each region.
