Adding and removing locations
When a Workbench is first installed a data location is configured by default. Unless your administrator has set things up otherwise, it will be named CLC_Data. It points to the following folder on the underlying system:
- Windows: C:\Users\<your_username>\CLC_Data
- Mac: ~/CLC_Data
- Linux: /homefolder/CLC_Data
Adding locations
To add a new location, click on the (![]() ) icon at the top of the Navigation Area, or go to:
) icon at the top of the Navigation Area, or go to:
File | Location |
New File Location (![]() )
)
Navigate to the folder to add as a CLC data location (see figure 3.5).
The name of the new location will be the name of the folder selected. To see the full path to the folder on the file system, hover the mouse cursor over the location icon
(![]() ).
).
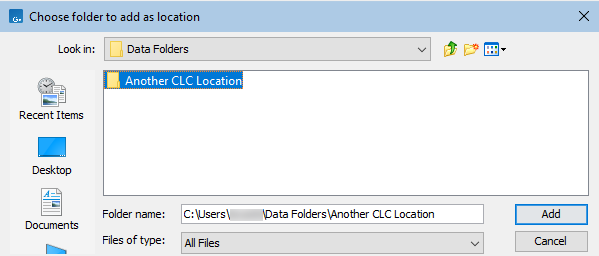
Figure 3.5: Navigating to a folder to use as a new CLC location.
The new location will appear in the Navigation Area (figure 3.6).
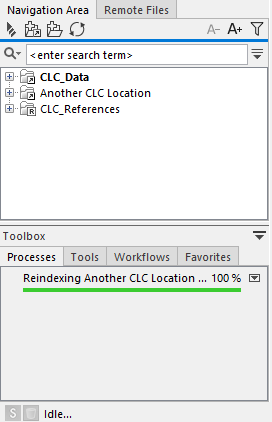
Figure 3.6: A new CLC location has been added. When the selected folder has not been used as a CLC location before, index files will be built, with the index building process listed in the Processes tab below the Navigation Area.
Additional notes about CLC locations
Requirements for folders being used as CLC locations:
- You must have permission to read from that folder, and if you plan to save new data elements or update data elements, you must have permission to write to that folder.
- CLC Data Locations must not contain other CLC Data Locations. This means that the underlying folder on the file system designated as a CLC Data Location must not be a subfolder of, nor contain, a folder already configured as a CLC Location in a CLC Workbench or CLC Server.
Having CLC Locations within or containing other CLC Locations will cause problems with the search indexes, which in turn can break search functionality and affect the resolution of data associations with CLC Metadata Tables.
Folders on a network drive or a removable drive can act as CLC locations. Please note though that interruptions to file access can lead to problems. For example, if you have set up a CLC Location on One Drive, start editing a cloning experiment, and your laptop goes to sleep, unsaved work may be lost, and errors relating to the lost connection may be reported. If your CLC locations are on such systems, enabling offline line access (aka "always available files") can avoid such issues.
CLC Locations appear inactive in the Navigation Area if the relevant drive is not available when you start up the Workbench. Once the drive is available, click on the Update All symbol (![]() ) at the top of the Navigation area to refresh the view. All available locations will then be shown as active. There can be sometimes be a short delay before the interface update completes.
) at the top of the Navigation area to refresh the view. All available locations will then be shown as active. There can be sometimes be a short delay before the interface update completes.
See Data sharing information for information about limitations associated with configuring the same folder as a CLC Data Location in more than one CLC Workbench.
Removing locations
To remove a CLC data location, right-click on the location (the top level folder), and select Location | Remove Location. The Location menu is also available under the top level File menu.
CLC data locations that have been removed can simply be re-added if you wish to access the data via the Workbench Navigation Area again.
After removing the CLC location, standard operating system functionality can be used to remove the folder and its contents from the local file system, if desired.