Analysis using the plugin and the IVA web interface
When the analysis is complete, you will get different kinds of output:
- A variant track with the annotated and filtered variants (figure 5.1). This track can be opened in a Genome Browser View by double-clicking on the name of the variant track in the Navigation Area.
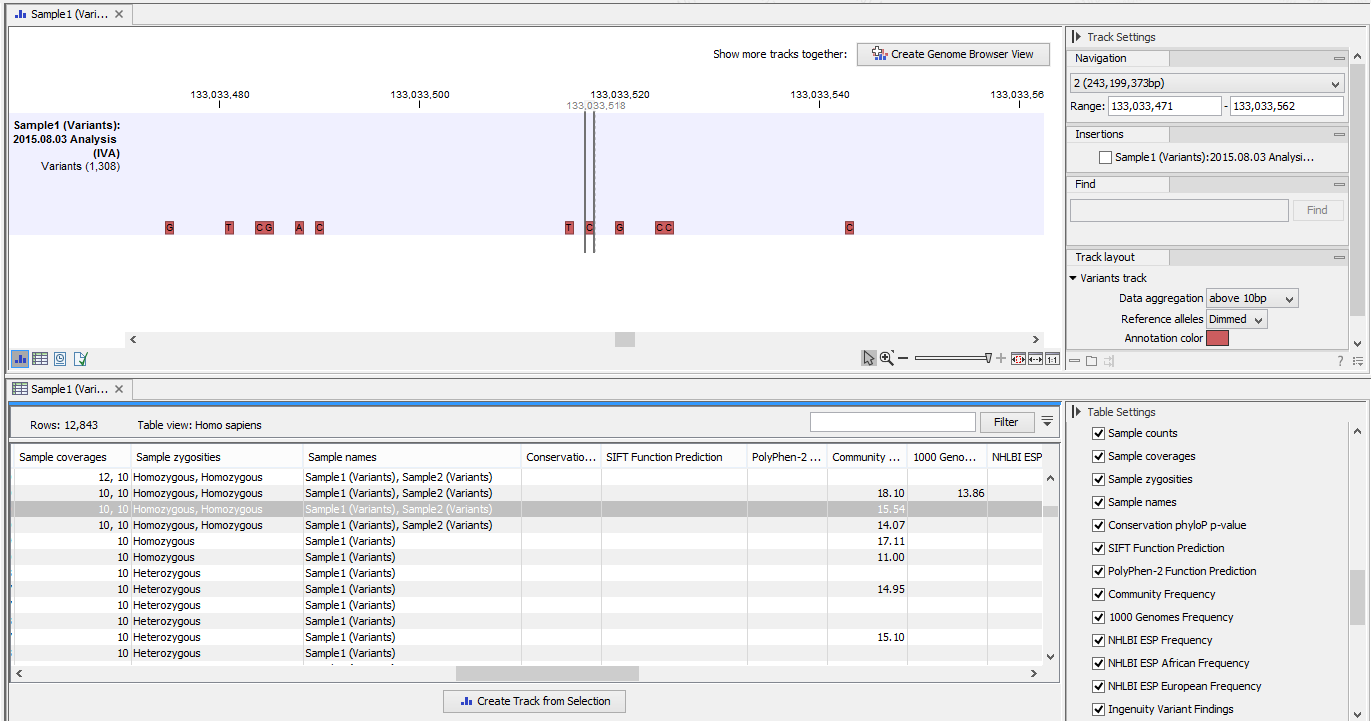
Figure 5.1: The result of the Ingenuity Variant Analysis opened in the Genome Browser View in CLC Genomics Workbench. The variant track is shown in split view with the variant table. - A document providing a link to the Ingenuity Variant Analysis page (see figure 5.2).

Figure 5.2: Copy this link into an internet browser to see the result of the Ingenuity Variant Analysis.Copying this link and pasting it into an internet browser will take you to the Ingenuity Variant Analysis page, where you can narrow down your analysis further by applying different filters or by adjusting the predefined filter settings.
- A log file, if you ticked the Open log box.
There are two different approaches to how you can handle the identified variants:
- Open the variants in the Genome Browser View in the Workbench. The identified variants can be viewed in track format in the Genome Browser View by double-clicking on the name of the variant track in the Navigation Area. The button labeled Create Genome Browser View in the upper right corner of the View Area can be used to create a list of tracks in the same view, which allows comparison of the identified variants with other tracks, such as the reference sequence, the CDS, read mappings, or other variant tracks.
- View the variants on the Ingenuity Variant Analysis web page. This option allows adjustment of the predefined filter settings. The variants in Ingenuity Variant Analysis can be accessed in two different ways:
- Use the link provided in one of the output files in the Workbench. Copy the link and paste it into an internet browser. This will send you directly to the variant analysis on the Ingenuity Variant Analysis web page. An example is shown in figure 5.3.
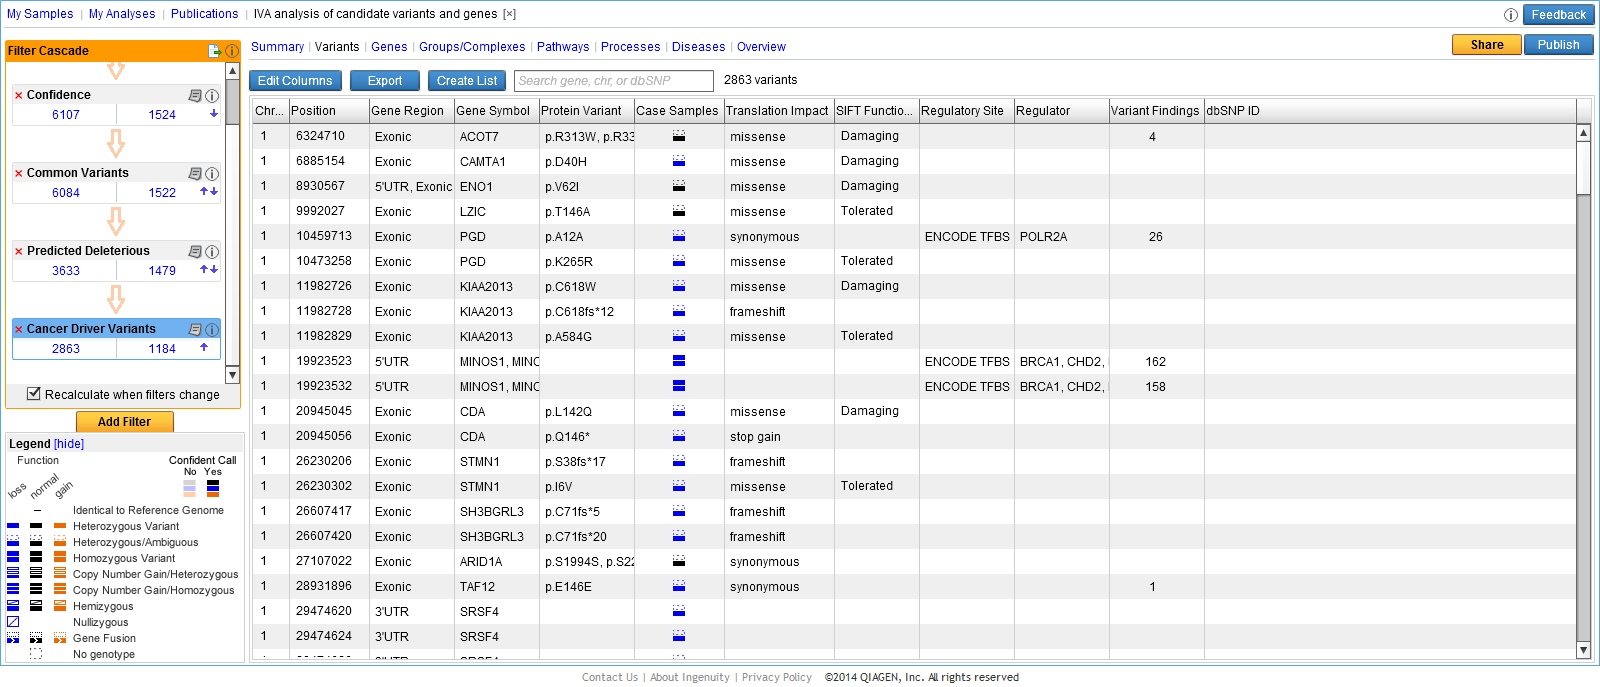
Figure 5.3: Copy the link provided in one of the output files and paste it into an internet browser to go directly to the specific variant analysis on the Ingenuity Variant Analysis page. - Open the variant track that was produced as one of the outputs. Right-click on the variant track in the Genome Browser View and select Launch Ingenuity Variant Analysis (figure 5.4). This will also send you directly to the Ingenuity Variant Analysis web page.
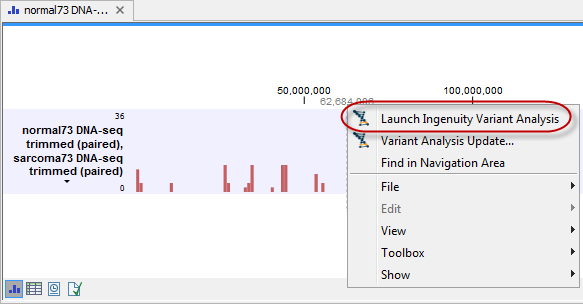
Figure 5.4: Right-clicking on the variant track in the Genome Browser View and selecting Launch Ingenuity Variant Analysis will send you directly to the specific variant analysis on the Ingenuity Variant Analysis page. - Use the link provided in one of the output files in the Workbench. Copy the link and paste it into an internet browser. This will send you directly to the variant analysis on the Ingenuity Variant Analysis web page. An example is shown in figure 5.3.
Ingenuity Variant Analysis enables you to apply a number of different filters. The example in figure 5.5 shows a filter cascade with the default filters. Note that in the case of the Hereditary Disease pipeline, four custom pipelines (one for each inheritance mode) with a fixed set of filters are available.
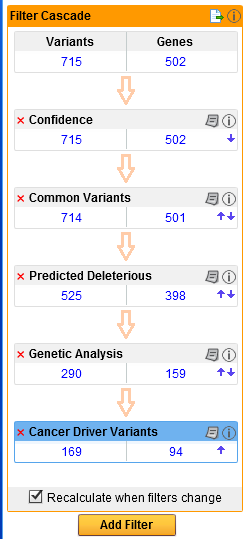
Figure 5.5: An example of an Ingenuity Variant Analysis filter cascade that narrows down the initial number of variants to focus on a limited number of specific variants that are left after applying a number of different filters.
After running the initial analysis from the Workbench, it is possible to customize the filter cascade in the Ingenuity Variant Analysis web interface: add more filters with the button labeled Add Filter found at the bottom of the filter cascade, and modify or delete existing filters with the paper icon found in the right hand side of the individual filters in the filter cascade (figure 5.6). Click on the information icon next to the paper icon to get more information about Ingenuity Variant Analysis.
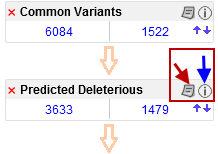
Figure 5.6: Click on the red cross if you would like to delete the filter, click on the paper icon (red arrow) to see the filter details, or if you would like to adjust them. Click on the information icon (blue arrow) if you would like to learn more about Ingenuity Variant Analysis.
When you have modified the filters on the Ingenuity Variant Analysis web page, you can either choose to use the options provided on the Ingenuity Variant Analysis web page to go into detail with the individual variants, or you can go back to the workbench and visualize the variants in the Genome Browser View.
The modified variant track can be imported into the Workbench by right-clicking on the original Ingenuity Variant Analysis variant track output that was generated with the default filter settings (see figure 5.7). Choose Variant Analysis Update and save the updated variant track in the Navigation Area. The updated variant track will be saved with the name extension "(IVA update)", which means that the original variant track will not be overwritten by the updated variant track.
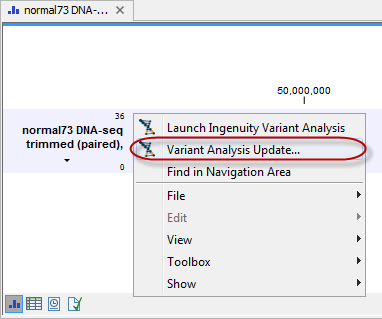
Figure 5.7: If you have made changes to the used filters, you can import the updated variant track into the Workbench by right-clicking on the original variant track and choosing "Variant Analysis Update".
When you have imported the updated variant track, we recommend that you open the updated variant track in split view with the table view. After running the variant analysis, the variant table will contain additional columns holding Ingenuity Variant Analysis-specific information. The type of analysis performed and which filters were used will determine which of these columns (see figure 5.8) will be added to your results.
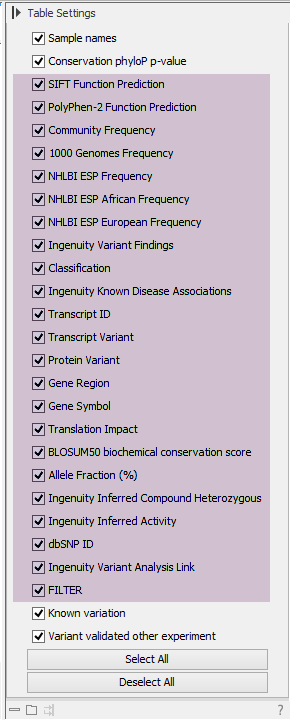
Figure 5.8: You can see which columns have been added in the Table view of the variants.
Please visit our website https://www.qiagenbioinformatics.com/products/ingenuity-variant-analysis/ for more information about the wide range of options available on the Ingenuity Variant Analysis web page. If you would like to learn more about Ingenuity Variant Analysis annotations, please see http://ingenuity.force.com/variants/VariantTutorials.