Import using the import dialog
To start the import using the import dialog:
click Import (![]() ) in the Toolbar
) in the Toolbar
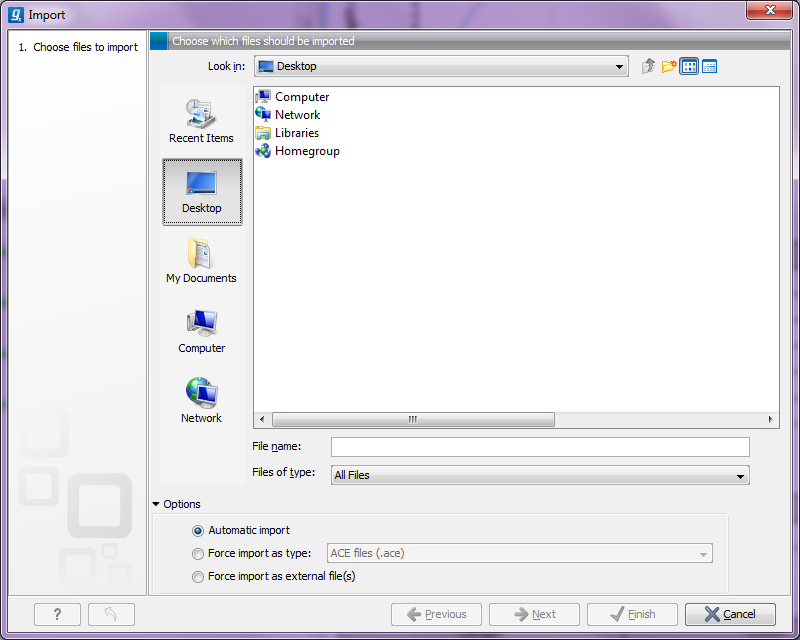
This will show a dialog similar to figure 6.1. You can change which kind of file types that should be shown by selecting a file format in the Files of type box.

Figure 6.1: The import dialog.
Next, select one or more files or folders to import and click Next.
This allows you to select a place for saving the result files.
If you import one or more folders, the contents of the folder is automatically imported and placed in that folder in the Navigation Area. If the folder contains subfolders, the whole folder structure is imported.
In the import dialog (figure 6.1), there are three import options:
- Automatic import
- This will import the file and CLC Main Workbench will try to determine the format of the file. The format is determined based on the file extension (e.g. SwissProt files have .swp at the end of the file name) in combination with a detection of elements in the file that are specific to the individual file formats. If the file type is not recognized, it will be imported as an external file. In most cases, automatic import will yield a successful result, but if the import goes wrong, the next option can be helpful:
- Force import as type
- This option should be used if CLC Main Workbench cannot successfully determine the file format. By forcing the import as a specific type, the automatic determination of the file format is bypassed, and the file is imported as the type specified.
- Force import as external file
- This option should be used if a file is imported as a bioinformatics file when it should just have been external file. It could be an ordinary text file which is imported as a sequence.
