Installing and configuring workflows
Workflows can be installed from the server web interface:
Admin (![]() ) | Workflows (
) | Workflows (![]() )
)
Click the Install Workflow button and select a workflow installer (for information about creating a workflow, please see the user manual of CLC Genomics Workbench, Biomedical Genomics Workbench, CLC Main Workbench or CLC Drug Discovery Workbench at http://www.qiagenbioinformatics.com/support/manuals/).
Once installed, the workflow is listed with a validated (![]() ) or attention (
) or attention (![]() ) status icon as shown in figure 13.1.
) status icon as shown in figure 13.1.
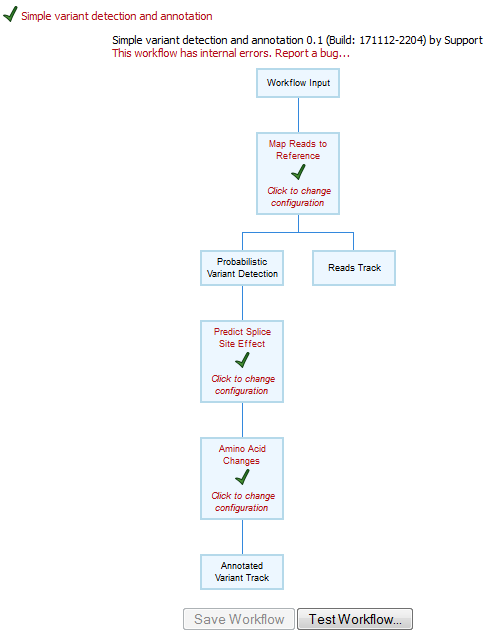
Figure 13.1: A workflow is installed and validated.
In this example, there are several workflow elements that can be configured. Simply click the box and you will see a dialog listing the parameters that need to be configured as well as an overview of all the parameters. An example is shown in figure 13.2.
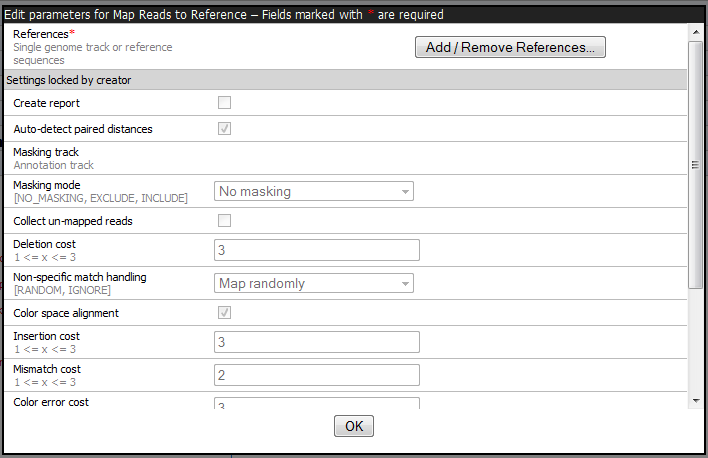
Figure 13.2: In this example only one parameter can be configured, the rest of the parameters are locked for the user.
In addition to the configuration of values for the open parameters, you can also specify which of those open parameters that should be locked (this means that the parameter cannot be changed when executing the workflow). Learn more about locking and unlocking parameters in the Workbench user manuals, which can be found at http://www.qiagenbioinformatics.com/support/manuals/.
If changes to the parameter settings of an installed workflow are made, the timestamp of the most recent change and the name of the administrator who made those changes are reported at the top of the workflow configuration view.