The Detect QIAseq RNAscan Fusions template workflow
The Detect QIAseq RNAscan Fusions template workflow can be found in the Toolbox at:
Template Workflows | Biomedical Workflows (![]() ) | QIAseq Sample Analysis (
) | QIAseq Sample Analysis (![]() ) | QIAseq Analysis Workflows (
) | QIAseq Analysis Workflows (![]() ) | Detect QIAseq RNAscan Fusions (
) | Detect QIAseq RNAscan Fusions (![]() )
)
Double-click on the Detect QIAseq RNAscan Fusions template workflow to run the analysis.
If you are connected to a CLC Server via your Workbench, you will be asked where you would like to run the analysis. We recommend that you run the analysis on a CLC Server when possible.
In the Select reads dialog, specify the sequencing reads to analyze (figure 7.1).

Figure 7.1: Select the sequencing reads by double-clicking on the file name or by clicking once on the file name and then on the arrow pointing to the right hand side.
The following dialog helps you set up the relevant Reference Data Set. If you have not downloaded the Reference Data Set yet, the dialog will suggest the relevant data set and offer the opportunity to download it using the Download to Workbench button. (figure 7.2).
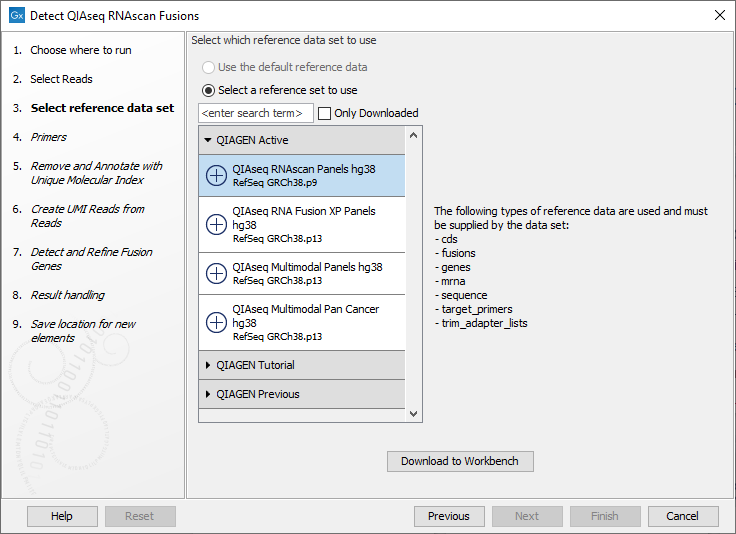
Figure 7.2: The relevant Reference Data Set is highlighted; in the text to the right, the types of reference needed by the workflow are listed. There is also an indication of how many data sets can be used with the workflow. In this case, the other data sets would only be visible when opening the "QIAGEN Previous" or "QIAGEN Tutorial" folder.
Note that if you wish to Cancel or Resume the Download, you can close the template workflow and open the Reference Data Manager where the Cancel, Pause and Resume buttons are available.
If the Reference Data Set was previously downloaded, the option "Use the default reference data" is available and will ensure the relevant data set is used. You can always check the "Select a reference set to use" option to be able to specify another Reference Data Set than the one suggested.
In the Select primers dialog, choose the primer corresponding to the panel used to generate the reads (figure 7.3).
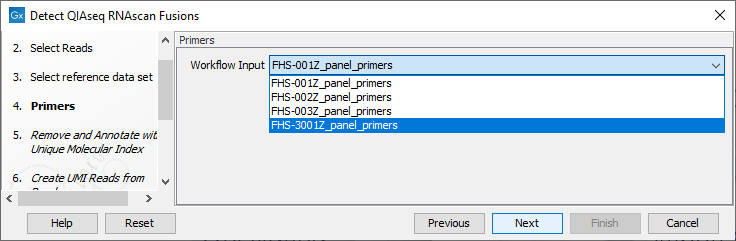
Figure 7.3: Select the primer track for the relevant panel.
In the Detect and Refine Fusion Genes dialog, it is possible to change the Promiscuity threshold, i.e., the maximum number of different fusion partners reported for a gene. You can also check for exon skippings by enabling the Detect exon skippings option, as well as check for fusions with novel exon boundaries by enabeling the Detect fusions with novel exon boundaries option.
In the final wizard step, choose to Save the results of the workflow and specify a location in the Navigation Area before clicking Finish.
Subsections