The QIAGEN GeneRead Panel Analysis workflow
The QIAGEN GeneRead Panel Analysis workflow can be found in the toolbox under "Targeted Amplicon Sequencing":
Toolbox | Ready-to-Use Workflows | Targeted Amplicon Sequencing (![]() ) | Somatic Cancer (TAS) (
) | Somatic Cancer (TAS) (![]() ) | QIAGEN GeneRead Panel Analysis (
) | QIAGEN GeneRead Panel Analysis (![]() )
)
Double-click on the QIAGEN GeneRead Panel Analysis workflow to run the analysis.
If you are connected to a CLC Server via your Workbench, then you will be asked where you would like to run the analysis. We recommend that you run the analysis on a CLC Server when possible. Click Next.
Select the sequencing reads that should be analyzed (figure 13.1).
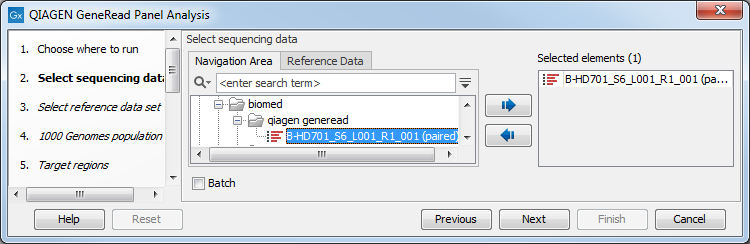
Figure 13.1: Select the sequencing reads by double-clicking on the file name or by clicking once on the file name and then on the arrow pointing to the right hand side.
If you would like to analyze more than one sample you can choose to run the analysis in batch mode. This is done by ticking "Batch" in the lower left side of the wizard and selecting the folder(s) that holds the data you wish to analyze. If you have your sequencing data in separate folders, you should choose to run the analysis in batch mode. You can learn more about batch analysis in the CLC Workbench user manual (see http://resources.qiagenbioinformatics.com/manuals/clcgenomicsworkbench/current/index.php?manual=Batch_processing.html).
In the next window, specify the relevant QIAGEN reference data set to be used with the workflow (figure 13.2)
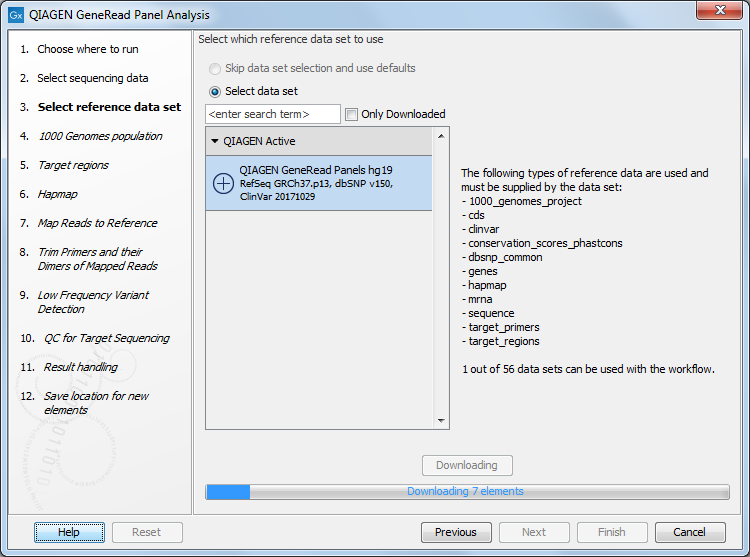
Figure 13.2: The default reference data set that can be selected is called QIAGEN GeneRead Panels hg19.
In the next wizard window (figure 13.3), you can restrict the calling of InDels and Structural Variants to the targeted regions only. All available gene panels are selected as the default choice. By clicking on the plus symbol (![]() ) on the right-hand side of the wizard it is possible to adjust the number and type of gene panels to use as target regions and thereby restrict the variant calling to only the sequences that have been targeted in your sequencing experiment. Click Next when you are done.
) on the right-hand side of the wizard it is possible to adjust the number and type of gene panels to use as target regions and thereby restrict the variant calling to only the sequences that have been targeted in your sequencing experiment. Click Next when you are done.
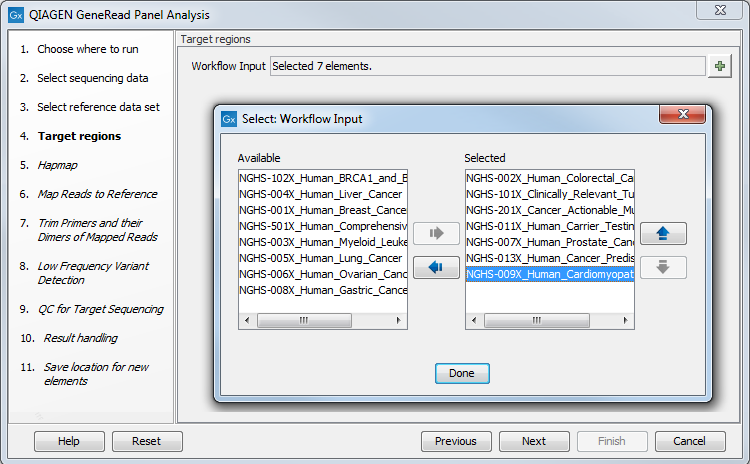
Figure 13.3: In this wizard step you can specify the targeted regions matching your read mapping.
In the next dialog, Hapmap, you can specify the populations that fit your dataset. Indeed, detected variants are annotated with a range of different data in this ready-to-use workflow, but for databases that provide data from more than one population as HapMap does, the populations relevant to the data set can be specified by the user (figure 13.4).

Figure 13.4: Select the relevant population from the list or use all populations that have already been selected.
From the list that can be accessed by clicking on the plus symbol (![]() ) you can choose the population that matches the population your samples are derived from. Please note that the populations available from the drop-down list can be specified with the Reference Data Manager found in the top right corner of the Workbench.
) you can choose the population that matches the population your samples are derived from. Please note that the populations available from the drop-down list can be specified with the Reference Data Manager found in the top right corner of the Workbench.
In the Map Reads to Reference wizard step (figure 13.5), you can configure the read mapper by setting the "Cost of insertions and deletions" to either "Affine gap cost" (default) or "Linear gap cost".
- Linear gap cost The cost of a gap is computed directly from the length of the gap and the insertion or deletion cost. This model often favors small, fragmented gaps over long contiguous gaps.
- Affine gap cost An extra cost associated with opening a gap is introduced such that long contiguous gaps are favored over short gaps.
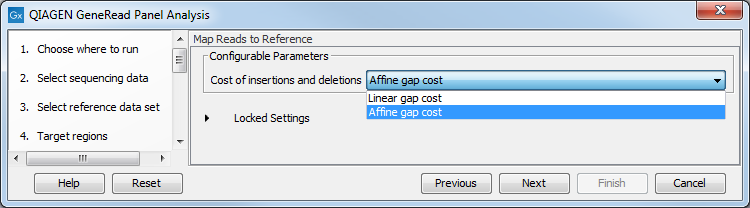
Figure 13.5: In this wizard step you can set the "Cost of insertions and deletions" to either "Affine gap cost" (default) or "Linear gap cost".
Specify the target primers for primer trimming in the Trim Primers and their Dimers of Mapped Reads window (figure 13.6). If you would like to add more GeneRead DNAseq Gene Panel target primers, this can be done using the Reference Data Manager as described in http://resources.qiagenbioinformatics.com/manuals/clcgenomicsworkbench/current/index.php?manual=Custom_Sets.html. It is also possible to either enable or disable the parameter "Only keep reads that have hit a primer". Note that it is enabled by default.
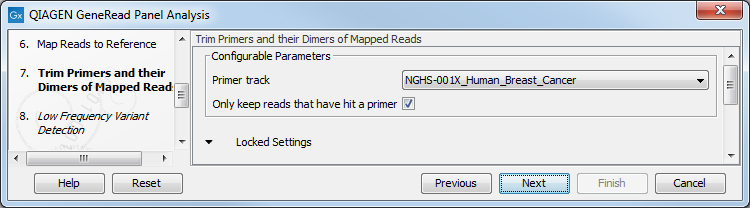
Figure 13.6: Select the primer track from the drop-down list.
In the Low Frequency Variant Detection wizard step (figure 13.7), you can specify the parameters for variant detection.
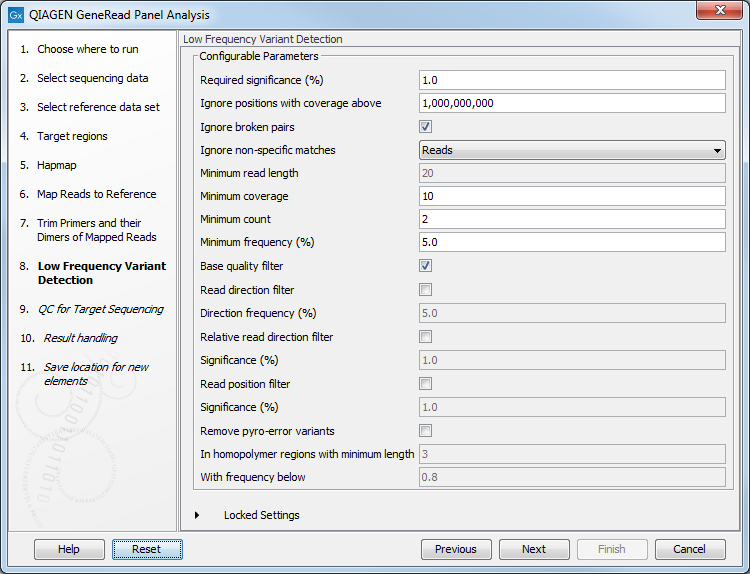
Figure 13.7: In this wizard step the parameters for variant detection can be adjusted.
Please see the CLC Workbench user manual for a description of the different parameters that can be adjusted in the variant detection step. A description of the "Low Frequency Variant Detection" tool can be found here: http://resources.qiagenbioinformatics.com/manuals/clcgenomicsworkbench/current/index.php?manual=Low_Frequency_Variant_Detection.html.
In the QC for Targeted Sequencing wizard step (figure 13.8), you can specify:
- Minimum coverage i.e., the minimum coverage needed on all positions in a target, in order for that target to be considered covered.
- Ignore non-specific matches and/or broken pairs When these are applied reads that are non-specifically mapped or belong to broken pairs will be ignored.
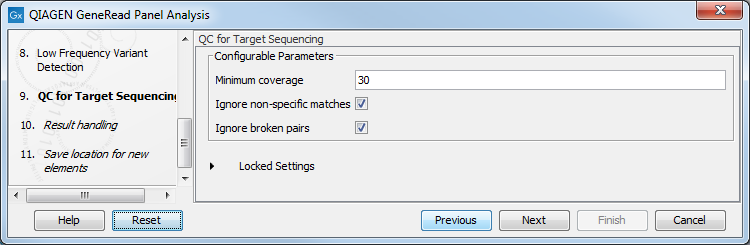
Figure 13.8: Adjust the parameters if desired.
Finally, in the last wizard step, pressing the button Preview All Parameters allows you to preview all parameters, but to make any changes, you must use the button Previous and Next to reach the relevant wizard window. If no change is necessary, choose to save the results and click Finish.
Subsections