Configuring the cloud connection
After one or more AWS S3 locations has be configured in your CLC Workbench, you can log into your CLC Genomics Cloud Engine by going to:
Connections | CLC Genomics Cloud Engine Connection (![]() )
)
This opens the dialog shown in figure 3.1. The following two settings must be configured:
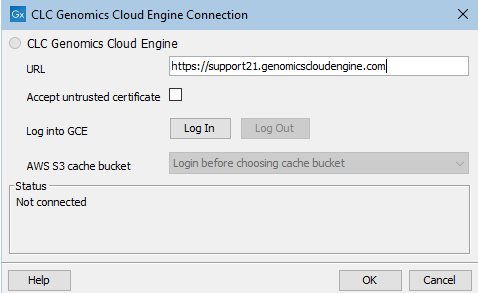
Figure 3.1: The CLC Genomics Cloud Engine Connection tool just after opening it from under the Connections menu.
URL: The URL pointing to the GCE service, as described in Prerequisites.
AWS S3 cache bucket: The cache bucket to be used when uploading data to the cloud, as described in Prerequisites.
The Accept untrusted certificate checkbox should be selected when GCE has been set up with a self-signed certificate.
Connecting to and disconnecting from GCE
Click on the Log In button in the CLC Genomic Cloud Engine Connection dialog to open a web browser page where you can log in to GCE using your company credentials. Once you have logged in successfully in the browser, go back to the CLC Workbench and click on the OK button in the CLC Genomic Cloud Engine Connection dialog to complete the log in process.
When the authentication succeeds, the Status box will contain the user name and region for the connection, and a green icon is visible near the top (figure 3.2).
Click on the Log Out button in the Cloud Connection dialog and then click on the OK button to disconnect the CLC Workbench from GCE. You will be asked to confirm this is what you wish to do.
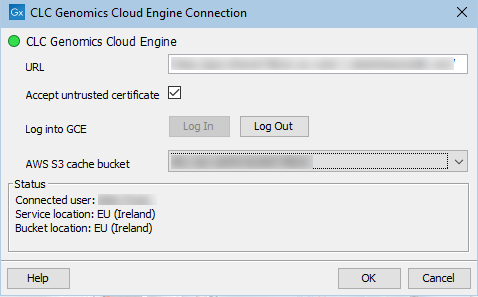
Figure 3.2: A valid GCE configuration is indicated by the green icon and the user details in the Status box.
The cloud connection status icon at the bottom, left hand side of the CLC Workbench looks like ![]() when the connection to CLC Genomics Cloud Engine is ready for workflows to be submitted. Hover the mouse cursor over this icon to see details about the connection.
when the connection to CLC Genomics Cloud Engine is ready for workflows to be submitted. Hover the mouse cursor over this icon to see details about the connection.