Cloud Job Search
To open the Cloud Job Search tool, go to
Utilities | Cloud Job Search (![]() )
)
or click on the Cloud button in the right hand side of the top Toolbar.
If a search is run without specifying search criteria, the most recent batches submitted to the CLC Genomics Cloud Engine will be listed (figure 6.1). The number of batches returned is limited. If the jobs you are looking for do not appear in the initial set returned, restrict the search criteria using the fields at the top. To do this, click on the Add search parameter button and start the search using the Start search button on the top, right hand side.
This should result in older submissions of interest being returned.
With the "Only from logged-in user" checkbox selected, then the list retrieved will include only jobs submitted by the user currently logged into the CLC Genomics Cloud Engine from the Workbench. When this checkbox is not selected, jobs submitted by any user of the CLC Genomics Cloud Engine instance can be retrieved.
Note: The table is not refreshed automatically. The "Start search" button must be pressed to update the information, including job status information.

Figure 6.1: Cloud Job Search allows you to search for and inspect the properties of jobs that have been submitted to the cloud.
In the side panel settings of a Cloud Job Search, you can select the columns to display and control whether batches or individual jobs are listed in the table (figure 6.2). When the Collapse batches option is checked, each batch is shown as a single row in the table. When unchecked, each individual job is shown in its own row.
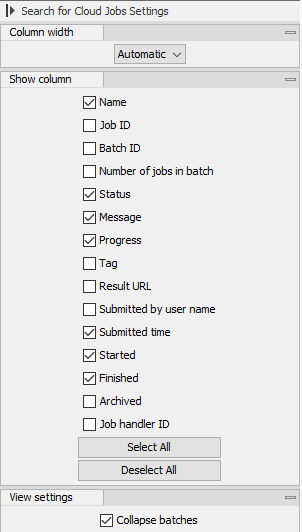
Figure 6.2: The Cloud Job Search side panel settings are used to configure what is shown in the table.
All jobs in a batch can be canceled by right-clicking on the row in the table corresponding to the batch (or a job in a batch, when displaying individual jobs), and selecting Cancel... | Cancel all jobs in batch from the menu that appears.
After a cloud job has completed, results can be retrieved by selecting the jobs of interest and then using the buttons at the bottom of the view (figure 6.3):
- Download All Results Download all results from the selected jobs, optionally including any exported files. See Downloading all results for further details.
- Download Metadata Download only the Workflow Result Metadata table for the selected jobs. Results can then be downloaded selectively using the Workflow Result Metadata table, as described in Selective download of results.
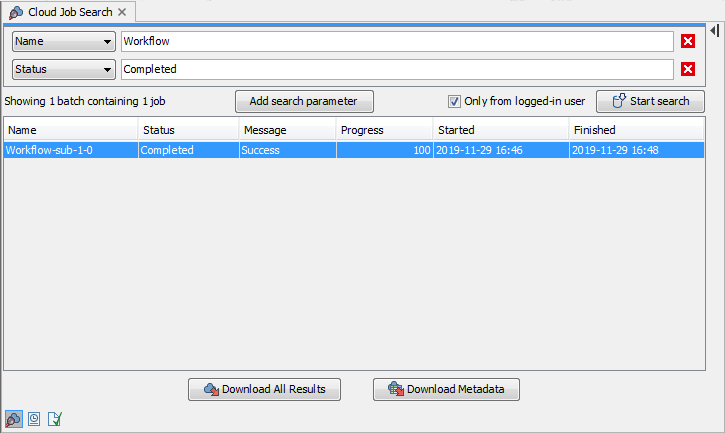
Figure 6.3: The Download All Results and Download Metadata buttons can be used to retrieve results from the cloud job submissions.
Subsections