Running tools
Launching tools and workflows
Analyses can be launched in multiple ways, including:
- Double-clicking on the name of the analysis to run in the Tools or Workflows tab in the Toolbox panel in the bottom, left side of the Workbench.
- Selecting the element(s) to analyze and dragging them from the Navigation Area onto the name of a tool or workflow in the Toolbox panel.
- Selecting a tool from the Tools menu or a workflow from the Workflows menu. These menus are available at the top of the Workbench and in many right-click context menus on data elements in the Navigation Area.
- Using the Quick Launch (
 ) tool.
The Quick Launch tool (figure 12.1) can be used to find and launch tools, installed workflows and template workflows. Quick Launch can be opened in several ways:
- Click the Quick Launch () button in the Workbench toolbar.
- Use the keyboard shortcut Ctrl + Shift + T (
 + Shift + T on Mac).
- Click the Quick Launch () option at the top of the Tools menu or Workflows menu.
- Click the () icon beside the search field at the top of the Tools tab or Workflows tab in the Toolbox panel at the bottom, left of the Workbench.
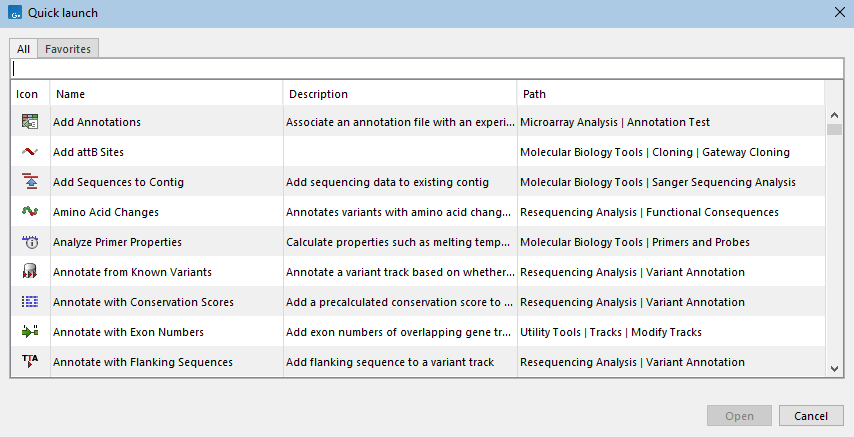
Figure 12.1: Tools, installed workflows and template workflows can be quickly found and launched using the Quick Launch tool.
Double-click on a row to launch that tool or workflow, or select a row and click on the Open button.
When terms are entered into the text field at the top of the Quick Launch dialog, only tools and workflows with those terms in their name, description or path will be listed (figure 12.2). Surround terms with single or double quotes to search for terms with spaces, for example "sequence list".
The Path column contains the location of tools and workflows relative to the Tools or Workflows menu, respectively. Functionality available under other menus includes the relevant menu name in the path.

Figure 12.2: Typing a term in the search field limits the list of tools and workflows to those with that term in their name, description or path.
Click on the Favorites tab to see the subset of tools that are frequently used or have been selected as favorites (see Favorites tab).
For tools where names have changed between Workbench versions, searches using terms in the older name will still find the relevant tool.
Configuring and starting jobs
When a tool or workflow is launched, a wizard opens. The launch wizard prompts for information required for the analysis. This includes:
- The data to be analyzed.
- Whether the analysis should be run in Batch mode.
- Settings required for the tool/workflow to run as intended.
- How results should be handled (e.g. what to save and where to save to).
Additionally, if multiple execution environments are available, an initial wizard step prompts for selection of the environment to use. Apart from the Workbench, execution environments that may be available include a CLC Server, or a CLC Genomics Cloud setup (figure 12.3).
Next and Previous buttons are provided at the bottom of each wizard step for navigating through the wizard. Clicking on the Help button in the bottom left corner of the launch wizard opens documentation relevant to the tool or template workflow being launched.
The rest of this section covers the general launch wizard steps in more detail.
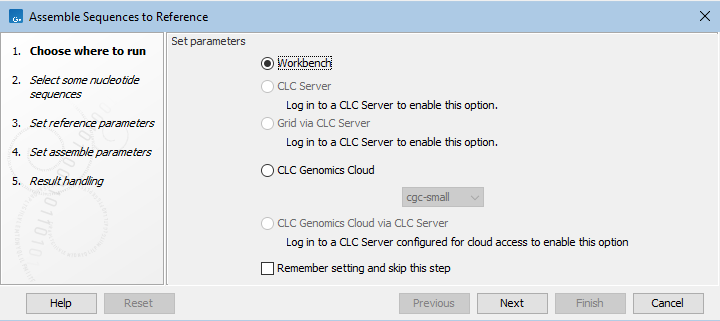
Figure 12.3: This job will be run directly on the Workbench, but it could be submitted to run on a CLC Genomics Cloud setup instead by selecting the "CLC Genomics Cloud" option.
Selecting the data to be analyzed
When data in a CLC Location is to be analyzed, a view of the Navigation Area is presented in the launch wizard (figure 12.4). The data to analyze should be entered into the "Selected elements" list on the right hand side. This can be done in a number of ways. For example:
- Double-click on data elements in the Navigation Area view in the launch wizard.
- Select one or more data elements in the Navigation Area view in the launch wizard and then click the arrow pointing right.
- Select a folder in the Navigation Area view in the launch wizard, right-click and select the option "Add folder contents" from the menu. This will select all the data elements present directly in that folder that could be used for that analysis. To select all usable data elements in that folder and in all of the folders it contains, choose the "Add folder contents (recursively)" menu option.
- Before opening the launch wizard, select the relevant data elements in the Navigation Area on the left side of the Workbench. These will automatically be placed in the "Selected elements" list in a subsequently opened launch wizard.
To remove an item from the "Selected elements" list, double-click on it, or select one or more items then click the arrow pointing left.
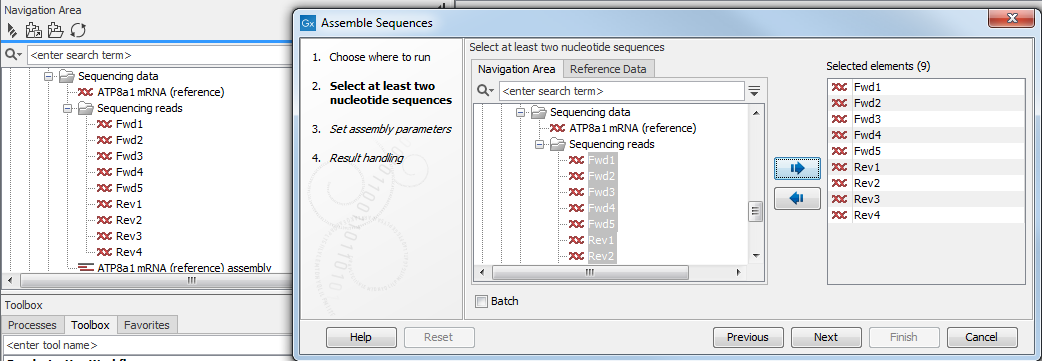
Figure 12.4: Input files from CLC Locations are selected in the Navigation Area presented in the left side of the wizard.
Specifying whether an analysis should be run in Batch mode
When multiple elements have been selected, most analysis tools will analyze them together, as a single input. Selecting the "Batch" option at the bottom of this initial wizard step results in the analysis being run multiple times, once for each "batch unit".
Configuring the available options for the tool
There may be one or more wizard steps containing options affecting how the analysis is run (figure 12.5).
The first time an analysis is launched, the default values for the available options are shown. Later launches of the same tool or workflow will show the values used in the previous run. Click the Reset button to reset option values in that wizard step to their (original) default values.
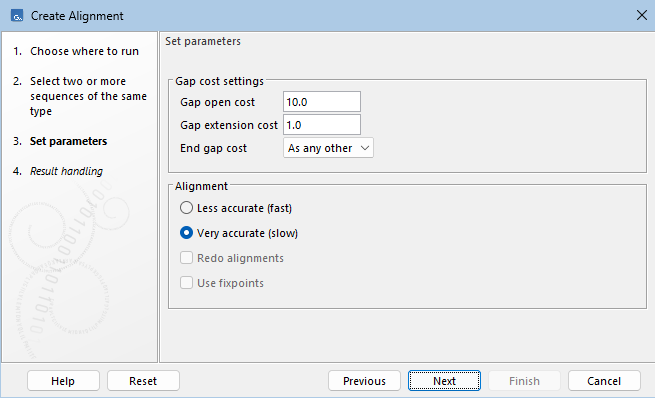
Figure 12.5: A wizard step prompting for settings specific to the analysis.
Specifying how results should be handled
See Handling results.
Submitting the analysis to be executed
In the final wizard step, a Finish button will be available. Clicking this starts the analysis on the CLC Workbench, or, if a different execution environment was selected, sends the job to that environment.
Subsections