Export graphics to files
Biomedical Genomics Workbench supports export of graphics into a number of formats. This
way, the visible output of your work can easily be saved and used in
presentations, reports etc. The Export Graphics function
(![]() ) is found in the Toolbar.
) is found in the Toolbar.
Biomedical Genomics Workbench uses a WYSIWYG principle for graphics export: What You See Is What You Get. This means that you should use the options in the Side Panel to change how your data, e.g. a sequence, looks in the program. When you export it, the graphics file will look exactly the same way.
It is not possible to export graphics of elements directly from the Navigation Area. They must first be opened in a view in order to be exported. To export graphics of the contents of a view:
select tab of View | Graphics
(![]() ) on Toolbar
) on Toolbar
This will display the dialog shown in figure 6.36.
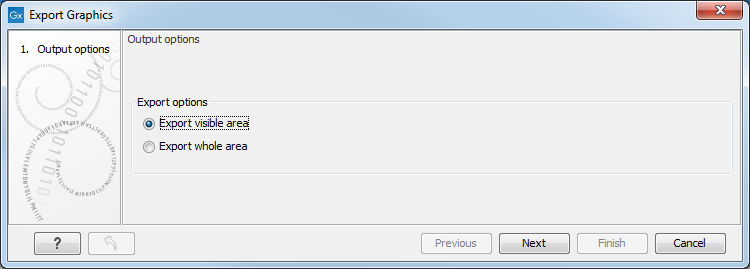
Figure 6.36: Selecting to export whole view or to export only the visible area.
In the following dialog, you can choose to:
- Export visible area, or
- Export whole view
These options are available for all views that can be zoomed in and out. In figure 6.37 is a view of a circular sequence which is zoomed in so that you can only see a part of it.
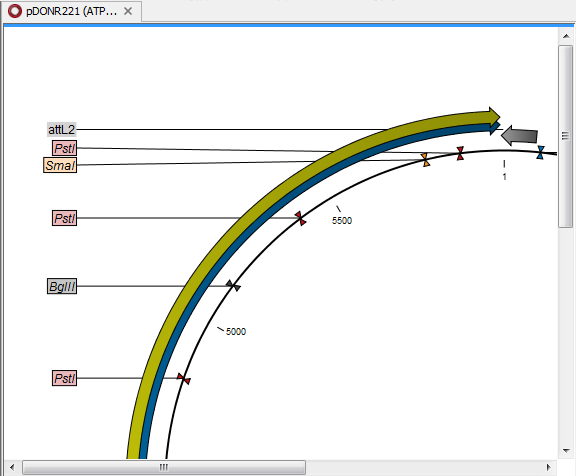
Figure 6.37: A circular sequence as it looks on the screen when zoomed in.
When selecting Export visible area, the exported file will only contain the part of the sequence that is visible in the view. The result from exporting the view from figure 6.37 and choosing Export visible area can be seen in figure 6.38.
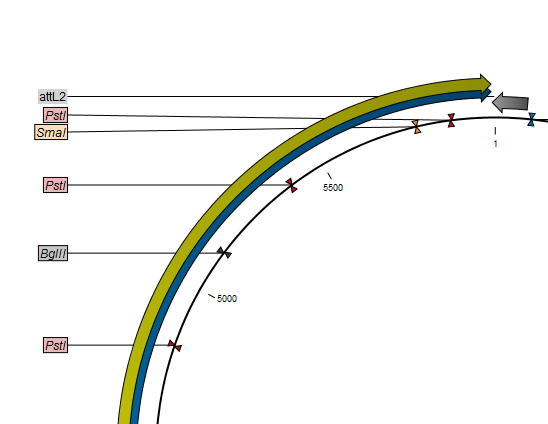
Figure 6.38: The exported graphics file when selecting Export visible area.
On the other hand, if you select Export whole view, you will get a result that looks like figure 6.39. This means that the graphics file will also include the part of the sequence which is not visible when you have zoomed in.
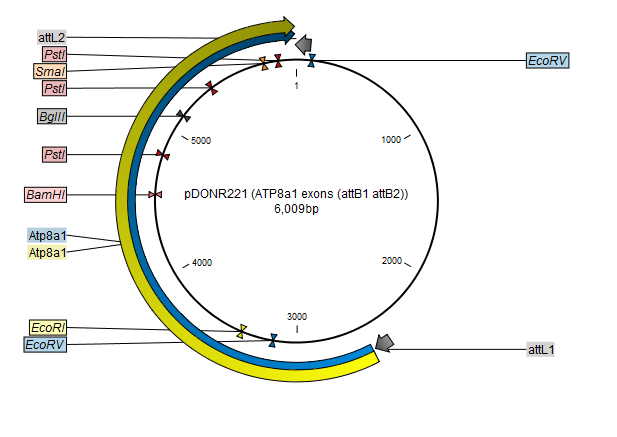
Figure 6.39: The exported graphics file when selecting Export whole view. The whole sequence is shown, even though the view is zoomed in on a part of the sequence.
For 3D structures, this first step is omitted and you will always export what is shown in the view (equivalent to selecting Export visible area).
Finally, choose a name and save location for the graphics file. Then you can either click Next or Finish, depending on what is available: clicking Next allows you to set further parameters for the graphics export, whereas clicking Finish will export using the parameters that you have set last time you made a graphics export in that file format (if it is the first time, it will use default parameters).
Subsections