Output
Besides connecting the elements together, you have to decide what the input and the output of the workflow should be. We will first look at specification of the output, which is done by right-clicking the output box of any tool and selecting Use as Workflow Output as shown in figure 8.12.

Figure 8.12: Selecting a workflow output.
You can mark several outputs this way throughout the workflow. Note that no intermediate results are saved unless they are marked as workflow output. In fact, when the workflow is executed, all the intermediate results are indeed saved temporarily, but they are automatically deleted when the workflow is completed. However, if a workflow fails, the intermediate results are not deleted and will be found in a folder named after the workflow with the mention "intermediate".
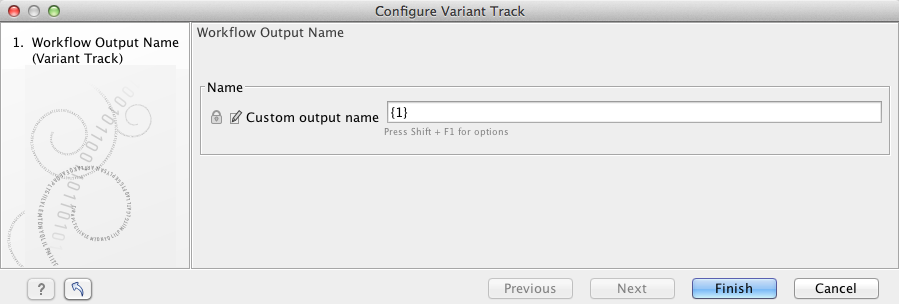
By double-clicking the output box, you can specify how the result should be named as shown in figure 8.13.

Figure 8.13: Specifying naming of a workflow output.
In this dialog you can enter a name for the output result, and you can make use of dynamic placeholders (non-case-sensitive) for creating this name (press Shift + F1 to get assistance). The following placeholders are available:
- {name} or {1} for the default name of the result.
- {input} or {2} for the name of the workflow input (and not the input to a particular tool within a workflow).
- {user} for the name of the user.
- {host} for the name of the host or the computer.
- {year}, {month}, {day}, {hour}, {minute}, and {second}. These use timestamp information based on the time an output is created. Thus, items of a workflow generated at different times can have different filenames when time-related placeholders are used.
When deciding on an output name, you can choose any combination of the placeholders, as well as custom names and punctuation, for example, {input}({day}-{month}-{year}).
A meaningful name to a variant track could be {2} variant track as shown in figure 8.14. Here, if your workflow input was named Sample 1, the result would be "Sample 1 variant track".

Figure 8.14: Providing a custom name for the result.
It is also possible to save the output into custom-named sub-folders by using a slash followed by the custom name you want to use for the newly created folder. For example the custom name /variants/{1} will create a sub-folder named "variants" relatively to the output location of the workflow in the Navigation Area, and store the data in that sub-folder.
When adding an exporter to a workflow, the placeholders for the exports follow the export placeholder scheme as described in Data export).
