Handling results
A tool will output one or more result files, some of which are optional and can be selected - or deselected - in the last wizard window called "Result handling". The kind of output files generated by a tool as well as a description of additional files are described in the tool specific sections of the manual.
The "result handling" window also allows you to decide whether you want to open or save your results.
- Open. This will open the result of the analysis in a view. This is the default setting.
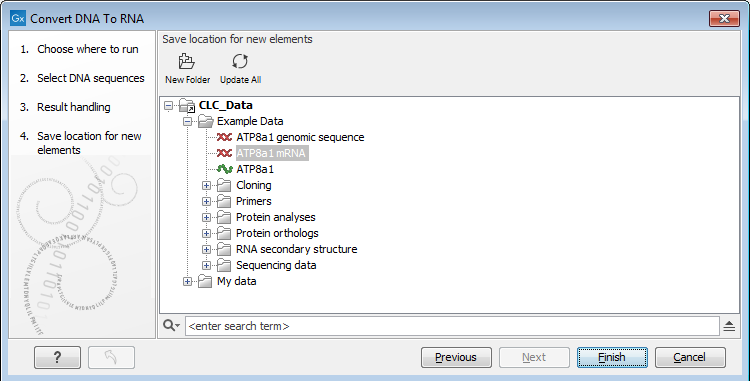
- Save The results will be saved rather than opened. You will be prompted for where you wish the results to be saved (figure 7.3). You can save to an existing area or create a new folder to save the results into.

Figure 7.3: Specify where to save the results of an analysis.
You may also have the option to "Open log". A log is a textual view of the progress of the job.
Click on the button labeled Finish to start the tool.
If you chose "Open" results, they will open automatically open one or several Views in the View Area. Each View is described by a file name appended with an asterisk to indicate that this View has not been saved yet. To save it, drag the View tab to the relevant location in the Navigation Area, or simply use the usual Ctrl + S (or ![]() + S). You can also right click on the tab and choose "Save" or use the "Save" button above the Navigation Area.
+ S). You can also right click on the tab and choose "Save" or use the "Save" button above the Navigation Area.
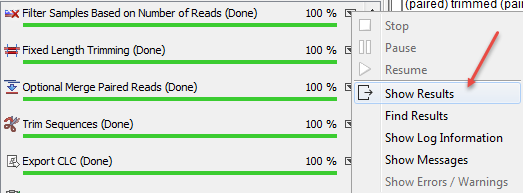
If you chose "Save" results, they will not open automatically, but they saved in the location you can specify in an extra wizard window. You can open the results by finding the file name in the Navigation Area after the tool is done processing, or by using the little arrow to the right of the analysis name in the Processes tab and choosing the option "Show results"(see figure 7.4).

Figure 7.4: Find your results using the little arrow to the right of the analysis name in the Processes tab.
