Configuring which fields should be available
To configure which fields that should be available3.2 go to the Workbench:right-click the data location | Location | Attribute Manager
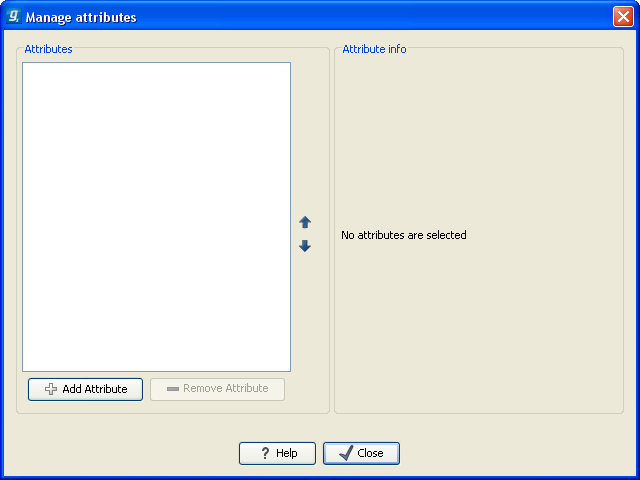
This will display the dialog shown in figure 3.21.

Figure 3.21: Adding attributes.
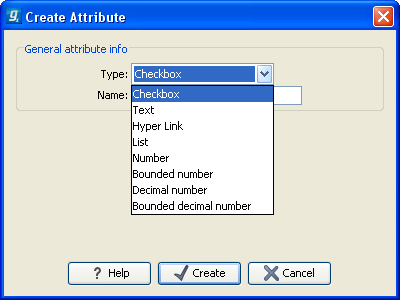
Click the Add Attribute (![]() ) button to create a new attribute. This will display the dialog shown in figure 3.22.
) button to create a new attribute. This will display the dialog shown in figure 3.22.

Figure 3.22: The list of attribute types.
First, select what kind of attribute you wish to create. This affects the type of information that can be entered by the end users, and it also affects the way the data can be searched. The following types are available:
- Checkbox. This is used for attributes that are binary (e.g. true/false, checked/unchecked and yes/no).
- Text. For simple text with no constraints on what can be entered.
- Hyper Link. This can be used if the attribute is a reference to a web page. A value of this type will appear to the end user as a hyper link that can be clicked. Note that this attribute can only contain one hyper link. If you need more, you will have to create additional attributes.
- List. Lets you define a list of items that can be selected (explained in further detail).
- Number. Any positive or negative integer.
- Bounded number. Same as number, but you can define the minimum and maximum values that should be accepted. If you designate some kind of ID to your sequences, you can use the bounded number to define that it should be at least 1 and max 99999 if that is the range of your IDs.
- Decimal number. Same as number, but it will also accept decimal numbers.
- Bounded decimal number. Same as bounded number, but it will also accept decimal numbers.
When you click OK, the attribute will appear in the list to the left. Clicking the attribute will allow you to see information on its type in the panel to the right.
Footnotes
- ... available3.2
- If the data location is a server location, you need to be a server administrator to do this
