How to edit preinstalled workflows
An important feature of the Biomedical Genomics Workbench is the possibility to add, delete, and replace tools in the preinstalled workflows (the tools found in the "Application" folder of the toolbox). Moreover, parameter settings can be unlocked or locked with different values.
The edited workflow can be installed in the Biomedical Genomics Workbench and Genomics Server as well as distributed between your collaborators.
When would it be relevant to edit a preinstalled workflow?
Example 1
You have an in-house database with common variants identified in people from your local region. You have imported the database variants as a track and would like to use this database for filtering out common variants instead of using HapMap, 1000 Genomes data and common dbSNP.
Hence, what you would like to do is to modify the "Filter Somatic Variants" workflow and replace the tools "Add Information from HapMap", "Add Information from 1000 Genomes project" and "Add Information from common dbSNP" with "Add Information from External Databases".
Example 2
You would like to only see the known cancer associated variants and non synonymous variants in the result.
You have used the "Create New Filter Criteria" tool to create a new filter criterion and would like to extend the "Identify Somatic Variants from Tumor Normal Pair" to include the "Identify Candidate Variants" tool at the end.
How can I edit a workflow
Click on Workflows -> Create new Workflow in the upper right side corner of the workbench (figure 9.1).
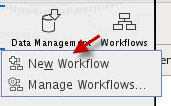
Figure 9.1: Click on Create new Workflow.
Next, drag and drop the preinstalled workflow that you would like to modify, from the toolbox to the opened Workflow Editor (figure 9.2). You can now see the underlying workflow. If you right click on the View Area and click "Layout", the layout will be adjusted.
You will see that at this point you do not have any input associated with the workflow. Please add an input at the top of the workflow by right-clicking on the first tool in the workflow.
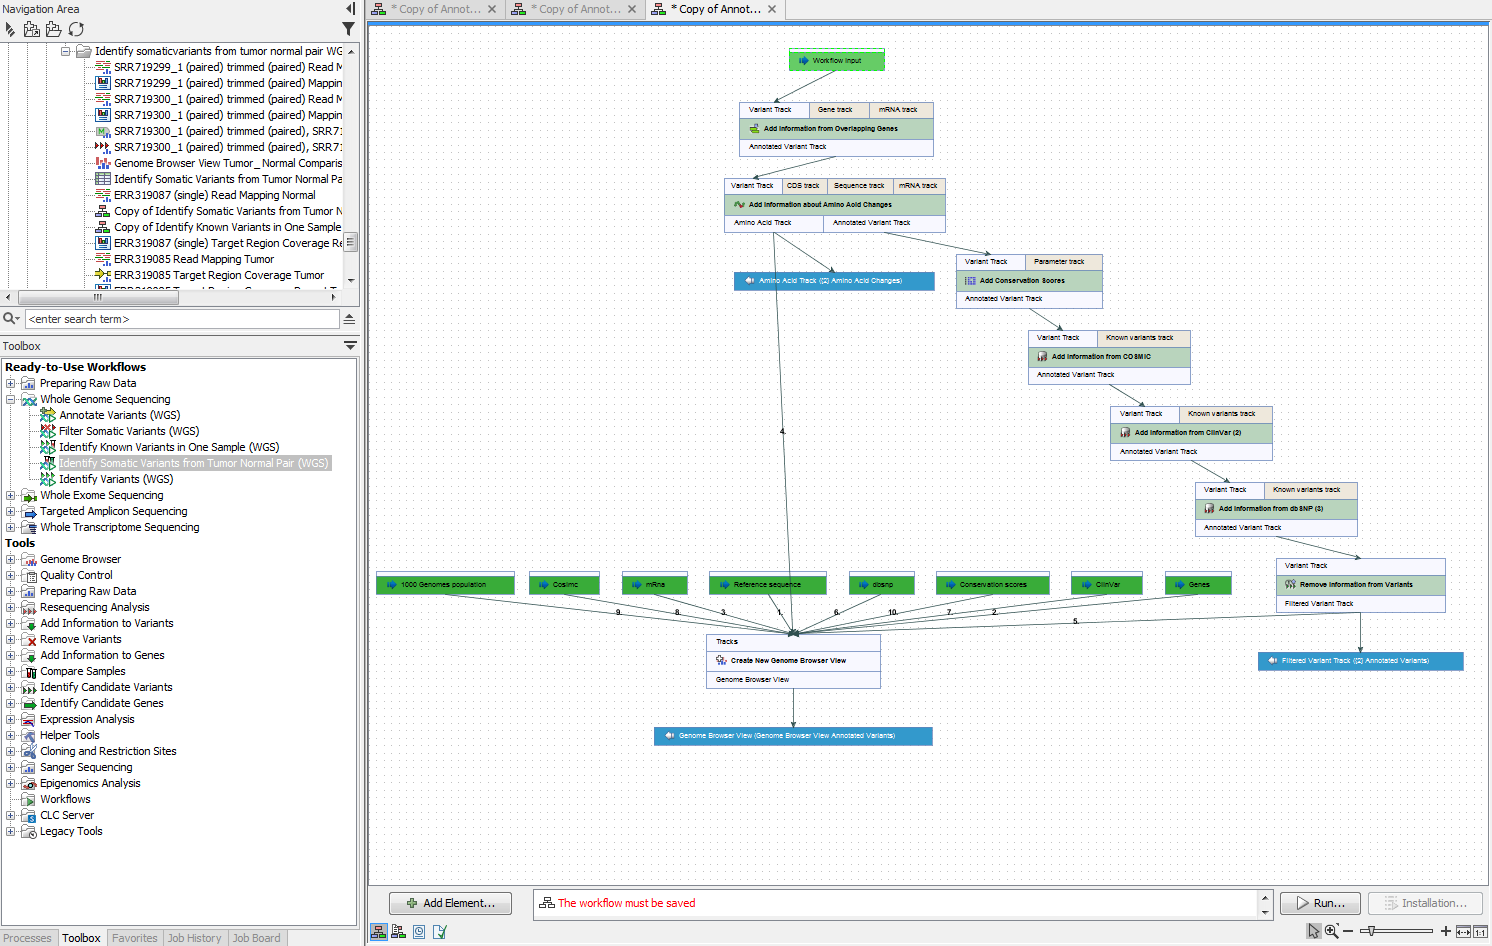
Figure 9.2: Drag and drop the presintalled workflow in the
workflow editor.
You can remove tools, connections, or drag and drop new tools from the toolbox into the workflow editor.
How can I install the edited workflow and where will it be in the toolbox
After you have finished editing your workflow, make sure that the validation of the workflow was successful and save your workflow design file.
Then click on the button labeled Installation. This will open the wizard in figure 9.3
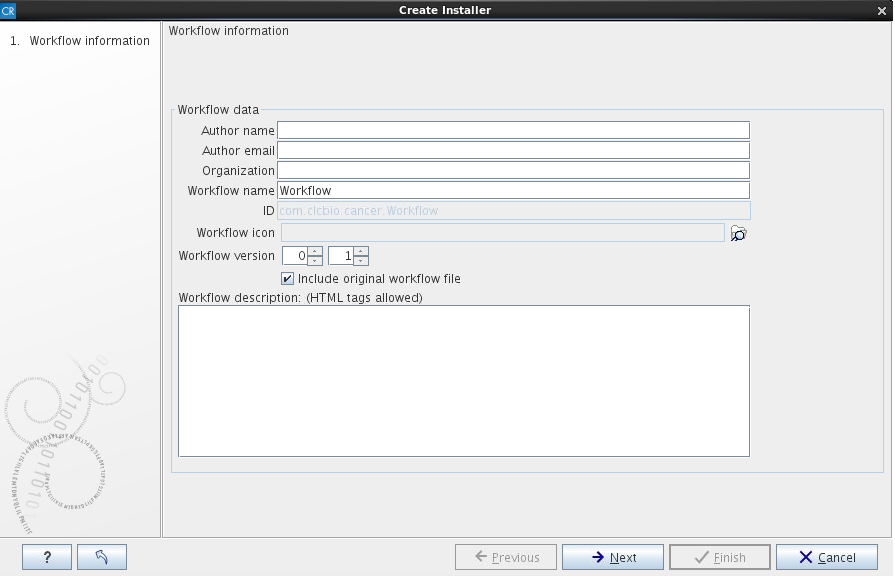
Figure 9.3: The "Create Installer" wizard to be used for workflow installation.
After you have added your details; your name, institution, workflow name and a description of the workflow, please click on the button labeled Next. This will open the wizard shown in figure 9.4

Figure 9.4: The second "Create Installer" wizard step.
The installed workflow will appear in the "Workflow" folder in the toolbox.