Adding a database location
To add a database location to the server, the server license should include the add-on CLC Bioinformatics Database.
Before adding a database location, you need to set-up the database. This is described in Database set-up.
To set up a database location, open a web browser and navigate to the CLC Server web interface.
Once logged in go to the Admin tab and unfold the Main configuration section. There are two headings relating to CLC data storage: Database locations and File system locations.
Under the Database locations heading, click the Add New Database Location button to add a new database location (see figure 3.1).
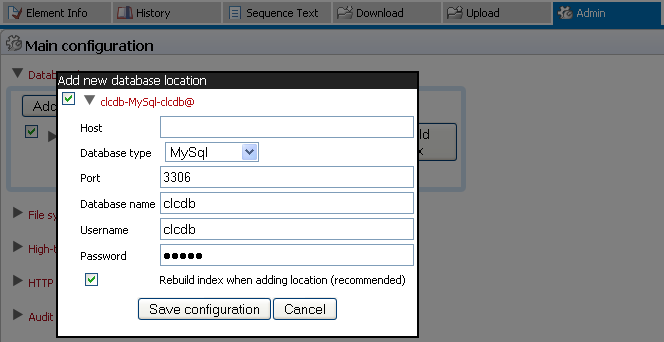
Figure 3.2: Database location settings.
Enter the required information about host, port and type of database. This can be done by entering the information in the respective fields and a connection string is generated (see figure 3.3). There is also the possibility to use a custom connection string if needed. The user name and password refers to the user role on your Database Management System (DBMS), see Database set-up.
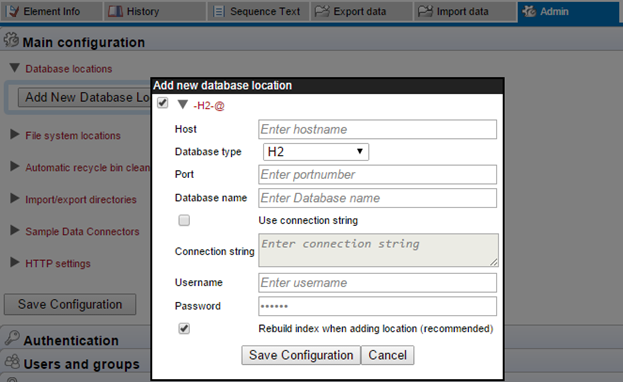
Figure 3.3: Add new database location.
Note that there are two versions of Oracle in the list. One is the traditional using SID style (e.g. jdbc:oracle:thin:@[HOST][:PORT]:SID) and the other is using thin-style service name (e.g. jdbc:oracle:thin:@//[HOST][:PORT]/SERVICE).
Click the Save Configuration button to perform the changes. The added database location should now appear in the Navigation Area in the left hand side of the window.