Custom Sets
Under the Custom Sets tab is functionality for generating and managing your own custom Reference Data Sets (figure 9.8).
The main reason for creating a Custom Set would be if you wish to simplify the configuration of your workflows with regards to reference data inputs. By assigning a workflow role to each element in a Reference Set, you will be able to refer to those elements via their workflow role instead of selecting them specifically from the Navigation Area when configuring your workflow.
See Configuring input and output elements for more about workflow roles.
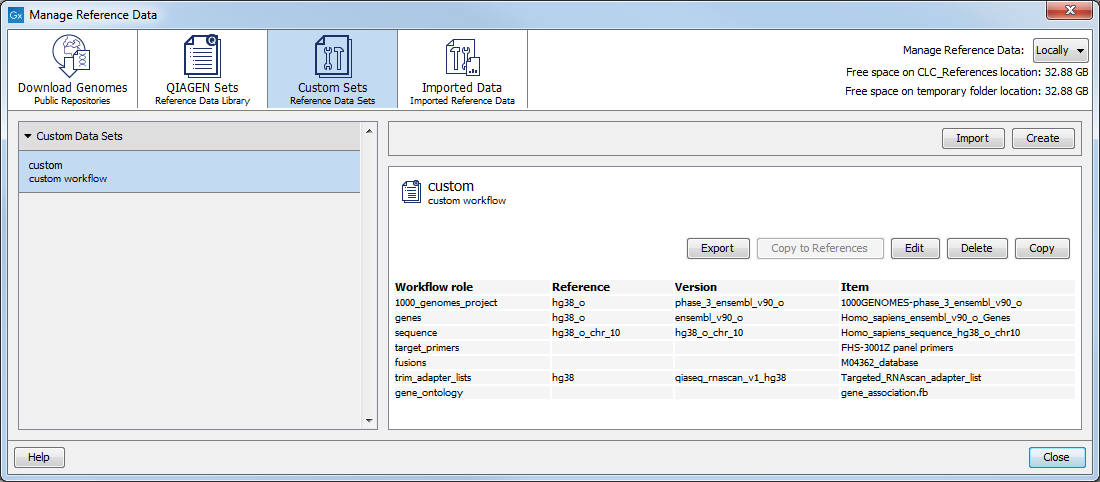
Figure 9.8: Functionality for creating and managing your own Reference Data Sets is available under the Custom Sets tab of the Reference Data Manager.
Click on the Create button under the the Custom Sets tab to start creating a reference set. After providing a name and description for the set, you can specify a workflow role and then select a data element to associate with that role. Continue to add roles and associated elements until your set is complete.
Roles can be added using a drop down menu of existing roles, or you can type a new name into the field (figure 9.9). Role names should usually be generic enough that they could apply to data elements in other sets equally well, but specific enough to understand the purpose of that data element when configuring a workflow.
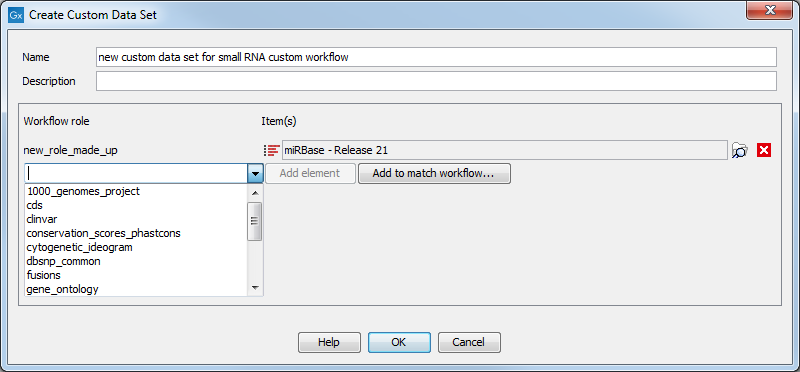
Figure 9.9: The Create Custom Sets dialog showing a newly created role, and the drop down menu of already existing roles.
If you are configuring a reference set that should contain element types similar to reference data used in an existing workflow, you can populate the set of roles from that existing workflow by clicking on the Add to match workflow ... button (figure 9.10).
You can select an installed workflow (from the drop down list) or a workflow from the Navigation Area (to be specified in the "Custom workflow" field) that has workflow roles assigned.
Check or uncheck the boxes in the "Workflow role" column to specify which roles you wish to include in your set.

Figure 9.10: Select a workflow with workflow roles configured as the basis for the roles to include in your custom set.
When you have completed this step, the roles you selected will be listed (figure 9.11). If the workflow you chose had elements configured with both workflow roles and specific data elements, those specified data elements will be listed in the Items fields, but can easily be replaced with elements of your choice.
Specify the data element to associated with each role by clicking on the Browse icon to the right of the field. Elements can be selected from under the Navigation Area tab or from under the Reference Data tab (figure 9.12).
Roles can also be deleted at this stage by clicking on the cross icon on the right hand side (figure 9.11).
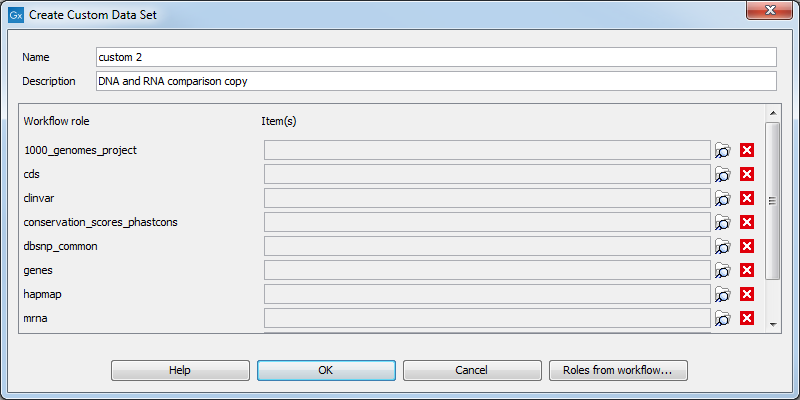
Figure 9.11: Select the data elements to associate with each role in your custom Reference Data Set.
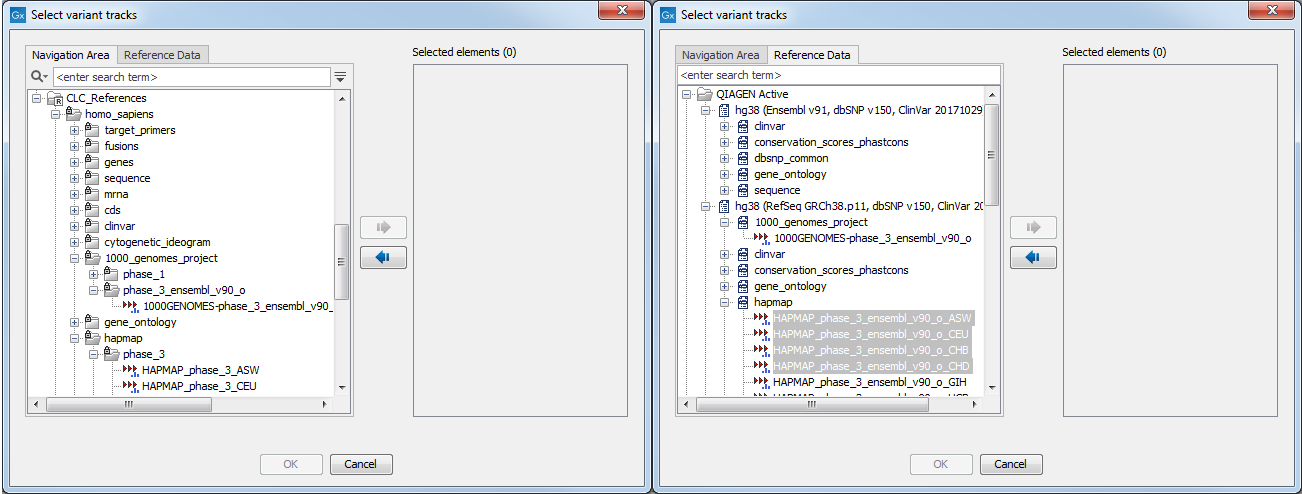
Figure 9.12: Find the relevant reference element, either from the Navigation Area tab or from the Reference Data tab.
Predefined roles may be associated with data elements of a particular type. For example, when browsing for an element to associate with the 1000_genomes_project role, tracks of other types, like genes tracks or sequence tracks, cannot be selected. There is no such restriction on custom roles.
Once created, the custom reference set will be listed under the Custom Data Sets heading, on the left hand side of the Reference Data Manager.
Subsections