Importing metadata
Metadata can be imported from an Excel format file into the CLC Genomics Workbench using the Import Metadata (If your analysis is contained in a workflow, a CLC Metadata Table can be created automatically. This is described in Launching workflows individually and in batches.
The Import Metadata tool
To import metadata into a CLC Metadata table, go to:
File | Import (![]() ) | Import Metadata (
) | Import Metadata (![]() )
)
The first column in the Excel file selected must have unique entries. That column will be designated as the key column. A different column can be specified as the key column later. For the optional step for association of data elements to work, the first column must contain entries that can be matched with the relevant data element names.
Importing the Excel file
In the box labeled Spreadsheet with sample information, select the Excel file (.xlsx/.xls) to be imported. The rows in the spreadsheet are displayed in the Metadata preview window, as shown in figure 11.3.
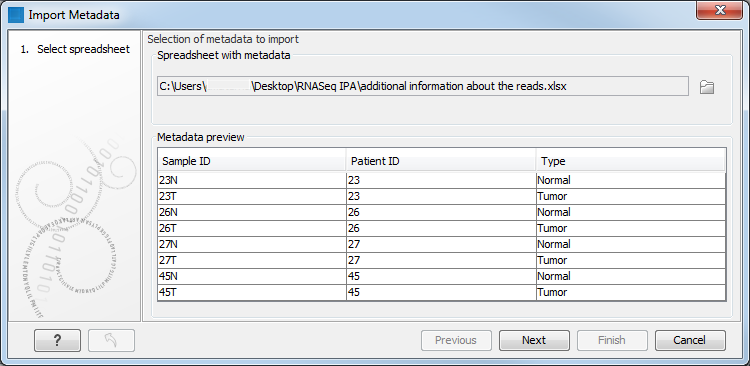
Figure 11.3: After an Excel file is selected, its rows are visible in the Metadata preview table.
All columns are imported as text columns. This can be later changed from within the Metadata Table editor as described in Editing metadata. There, you can change the column data types (e.g. to types of numbers, dates, true/false) and you can designate a new key column.
Associating metadata with data (optional)
The "Associate with data" wizard step (figure 11.4), is optional. To proceed without associating data to metadata, click on the Next button. Associating data with metadata can be done later, as described in Associating data elements with metadata.
To associate data with the metadata:
- Click on the file browser button to the right of the Location of data field
- Select the data elements to be associated.
- Select the matching scheme to use: Exact, Prefix or Suffix. These options are described in Matching schemes.
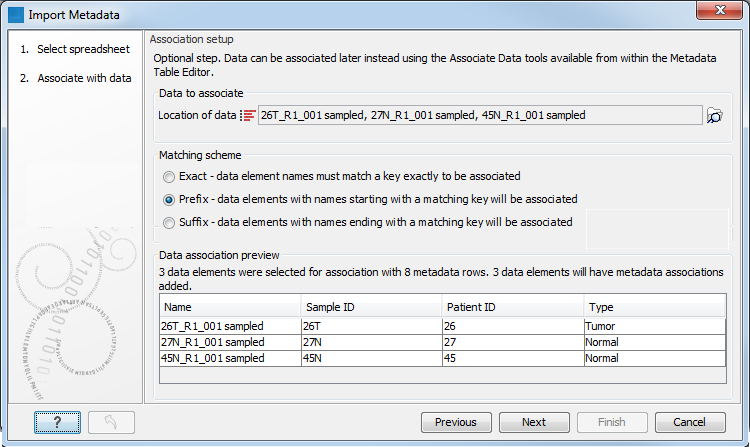
Figure 11.4: Three data elements are selected for association. The "Prefix" partial matching scheme is selected for matching data element names with the appropriate metadata row, based on the information in the Sample ID column in this case.
The Data association preview area shows data elements that will have associations created, along with information from the metadata row they are being linked with. This gives the opportunity to check that the matching is leading to the expected links between data and metadata.
You can then select where you wish the metadata table to be saved and click on Finish.
The associated information can be viewed for a given data element in the Show Element Info view (figure 11.5).
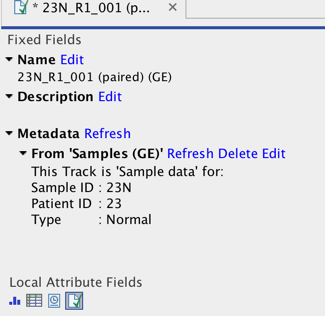
Figure 11.5: Metadata associations can be seen, edited, refreshed or deleted via the Show Element Info view.