Configuring an AWS Connection in the Workbench
To configure an AWS connection, go to:
Connections | AWS Connections (![]() )
)
After a connection has been configured, it will look like that in figure 3.1, where AWS connections are listed, along with information about their status. These can be edited or removed, if desired. The status is indicated using colors. Green indicates the connection is valid and ready for use.
Connections to a CLC Genomics Cloud are indicated in the CGC column. To submit analyses to the CLC Genomics Cloud, the CLC Cloud Module must be installed and a license for that module must be available.
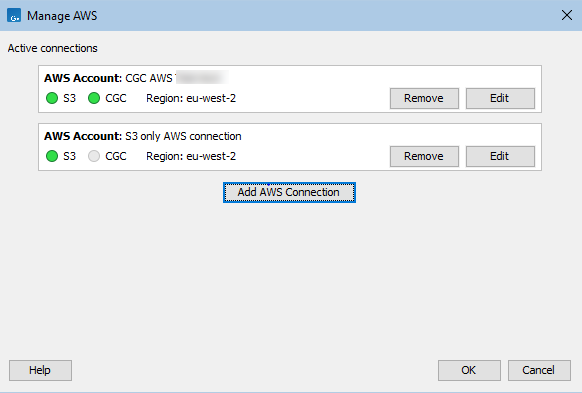
Figure 3.1: The configuration dialog for AWS connections. A valid connection has been configured and S3 locations will be available via exporters and relevant importers in the Workbench.
Click on the Add AWS Connection button to configure an AWS connection. Enter the following information (figure 3.2):
- Connection name: A short name of your choice, identifying the AWS account. This name will be shown as the name of the data location when importing data to or exporting data from Amazon S3.
- Description: A description of the AWS account (optional).
- AWS access key ID: The access key ID for programmatic access for your AWS IAM user.
- AWS secret access key: The secret access key for programmatic access for your AWS IAM user.
- AWS region: An AWS region. Select from the drop-down list.
- AWS partition: The AWS partition for your account.
The dialog continuously validates the settings entered. When they are valid, the Status box will contain the text "Valid" and a green icon will be shown. Click on OK to save the settings.
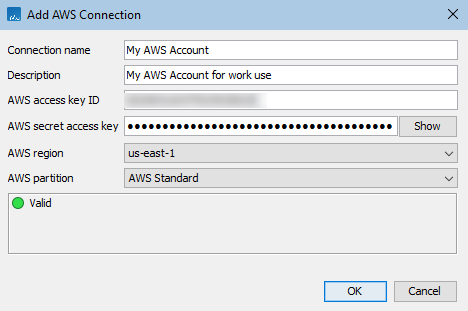
Figure 3.2: Configuration of an AWS Connection in a CLC Workbench
AWS credentials entered are stored, obfuscated, in Workbench user configuration files.