Introduction to setting up and managing Metadata Tables
This section provides a brief introduction on how to create and manage Metadata Tables. For more detailed information on how to create, setup, edit and manage metadata associated to a sample, please see the CLC Genomics Workbench manual http://www.clcsupport.com/clcgenomicsworkbench/current/index.php?manual=Metadata.html and the Typing and Epidemiological Clustering of Common Pathogens tutorial located at http://www.clcbio.com/support/tutorials/.
To create an empty metadata table, click on the toolbar menu
New | Metadata Table (![]() ).
).
This will open a new Metadata Table with no columns and no rows (as shown in figure 8.1).
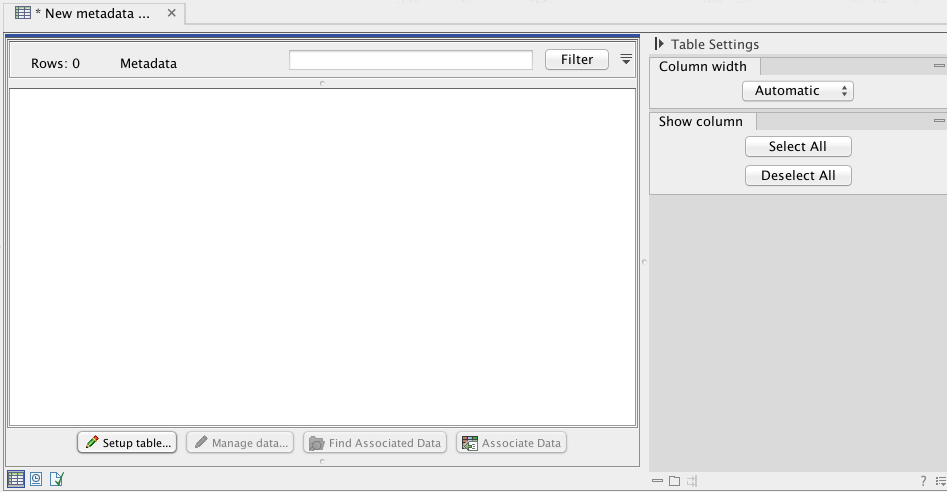
Figure 8.1: The created Metadata Table is empty.
Columns and their headers must be defined before actual metadata can be added to the empty table, so click on the button Setup Table (![]() ). You can define columns and their headers manually using the functionality of the wizard window (see figure 8.2), or you can import the structure of an already existing metadata table saved as a spreadsheet in your computer. In this case, click on Setup Structure from File, and select the spreadsheet that contains the metadata you would like to import in your workbench. A message 'Imported n columns from the file. Please set up the type of the new columns, and ensure a key column exists' will appear. You can also see that your metadata table has now n column with headers.
). You can define columns and their headers manually using the functionality of the wizard window (see figure 8.2), or you can import the structure of an already existing metadata table saved as a spreadsheet in your computer. In this case, click on Setup Structure from File, and select the spreadsheet that contains the metadata you would like to import in your workbench. A message 'Imported n columns from the file. Please set up the type of the new columns, and ensure a key column exists' will appear. You can also see that your metadata table has now n column with headers.
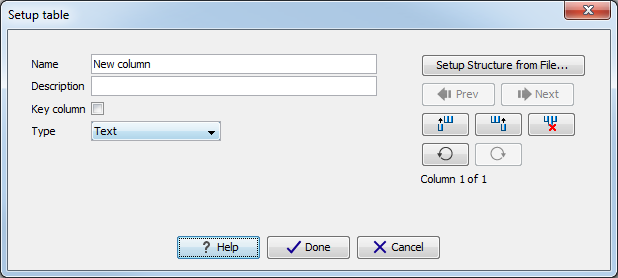
Figure 8.2: The Setup table windows allows you to create columns and specify headers for your metadata table.
Note! Only the structure of the spreadsheet - but not the metadata itself - are imported at this point. Before importing the actual metadata, it is required to specify the following for each of the created columns (to navigate among the columns, click Previous column or Next column):
- Name defines the header of the column. You can edit names to make them match exactly the name of the header you will want to import your data from later on.
- Description allows adding of additional free text explanation.
- Key column can only be used for a column with unique values, meaning that cell values in the column must be present and unique. A typical key column contains identifiers such as the name(s) of the sample read file. At most one key column is allowed in a given Metadata Table. This key column has to be defined (tickbox) before importing the metadata.
- Type describes the type of cell value allowed in the column. If you do not define the type of data you are about to import in that particular column, you may encounter problems in later steps. For example, setting the data type as "date" ensures that all the dates in your spreadsheet are written consistently among themselves, enabling accuracy when filtering your data by dates later on. The available value types are:
- Text
- Integer (a whole number)
- Floating-point number (no fixed number of digits before and after the decimal point)
- Truth value (e.g. true/false or yes/no)
- Date (specify the format used in the spreadsheet, e.g. dd/mm/yy)
- Date and time (specify the format used in the spreadsheet, e.g. dd/mm/yy h:mm a)
When you are done setting up your table, click on the button labeled "Done".
You now need to import the data. Click on the Manage data (![]() ) and choose to Import Rows from File. Select a spreadsheet (figure 8.3) with headers identical to the headers you just created (e.g. re-use the spreadsheet used to setup the Metadata table in the previous step) and click on the button labeled "Done" to start importing the actual Metadata content.
) and choose to Import Rows from File. Select a spreadsheet (figure 8.3) with headers identical to the headers you just created (e.g. re-use the spreadsheet used to setup the Metadata table in the previous step) and click on the button labeled "Done" to start importing the actual Metadata content.
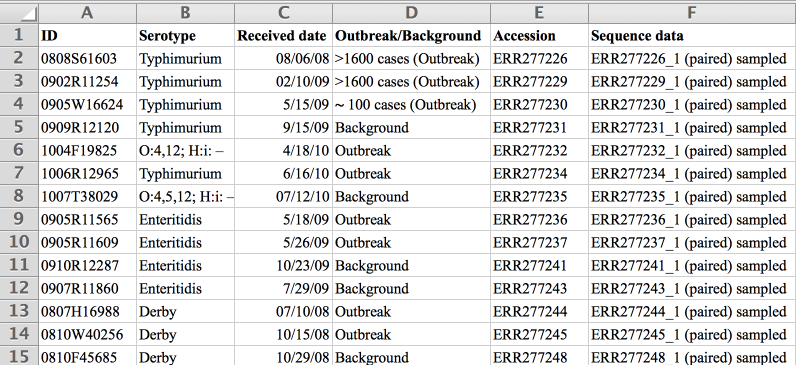
Figure 8.3: An example on how metadata can be organized in a tabular format.
The New metadata table is now populated with the metadata from your spreadsheet (figure 8.4). The previously selected Key Column appears in blue. Save your New Metadata Table.
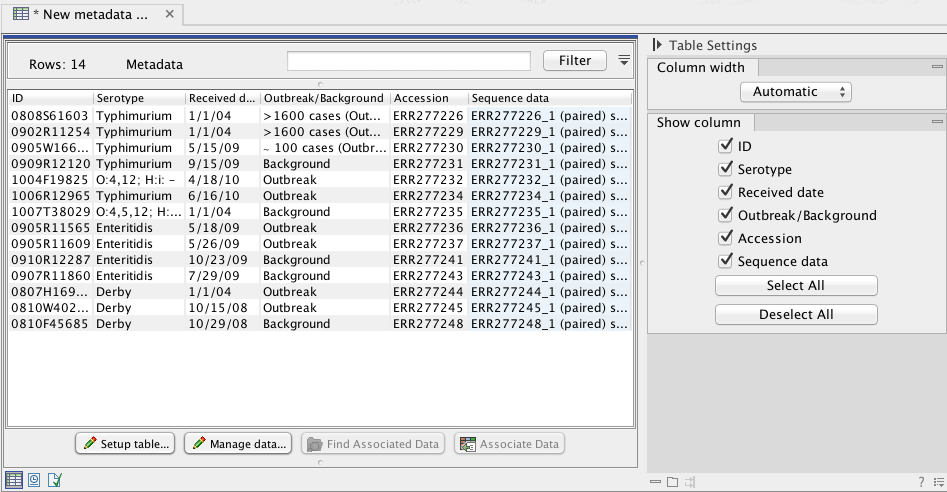
Figure 8.4: Successful import of metadata. Headers of spreadsheet match headers defined in the Metadata Table.