Configuring your setup
If you have not already, please download and install your license to the master node. (See Downloading a License.) Do not install license files on the job nodes. The licensing information, including how many job nodes you are can run, are all included in the license on the master node.
To configure your master/execution node setup, navigate through these tabs in the web administrative interface on your master node:
Admin (![]() ) | Job distribution (
) | Job distribution (![]() )
)
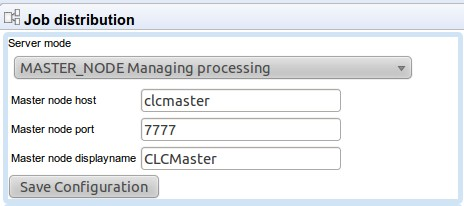
First, set the server mode to MASTER_NODE and provide the master node address, port and a human-readable name as shown in figure 6.3.

Figure 6.3: Setting up a master server.
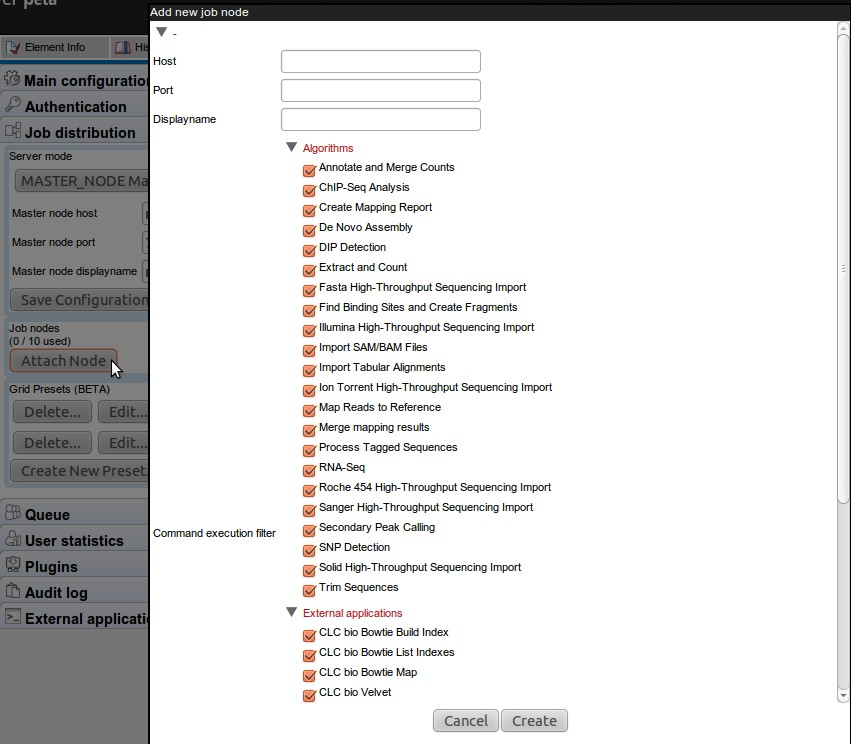
Next, click Attach Node to specify a job node. Fill in the appropriate information about the node (see figure 6.4).

Figure 6.4: Setting up a master server.
Besides information about the node hostname, port and displayname, you can also configure what kind of jobs that node is able to execute.
Repeat this process for each job node you wish to attach and click Save Configuration when you are done.
Once set up, the job nodes will automatically inherit all configurations made on the master node. At any time, you can log in to a job node itself via its Server administrative interface.
Note that you will get a warning dialog if there are types of jobs that are not enabled on any of the nodes.
Note that when a node has finished a job, it will take the first job in the queue that is of a type the node is configured to process. This then means that, depending on how you have configured your system, the job that is number one in the queue will not necessarily be processed first.
After your job nodes are all configured, file system locations should be added (see the section on ). We recommend this is done at this point as all job nodes will then inherit the configurations made on the master node.
In order to test that access works for both job nodes and the master node, you can perform the following check:
- Create a new folder in the Workbench in the new data location (on disk, this will be done by the master node). Import some data into this folder.
- In the Workbench, run one of the analyses in the server toolbox and choose to save the results in the new folder (this will be done by the job node)
- Once finished, try to rename one of the result files in the Workbench (on disk, this will be done by the master node). If this works, it means that both master and job nodes are able to write to the same files.
One relatively common problem that can arise here is root squashing. This often needs to be disabled, because it prevents the servers from writing and accessing the files as the same user - read more about this at http://nfs.sourceforge.net/#faq_b11.
