Track lists as output
The example in figure 9.17 shows how to generate a track list in a workflow. Any track based on a compatible genome can be added to the same track list. This includes reference tracks as well as track results generated by elements of that workflow. In the latter case, only those for which a workflow output element has been configured can be included in a track list.
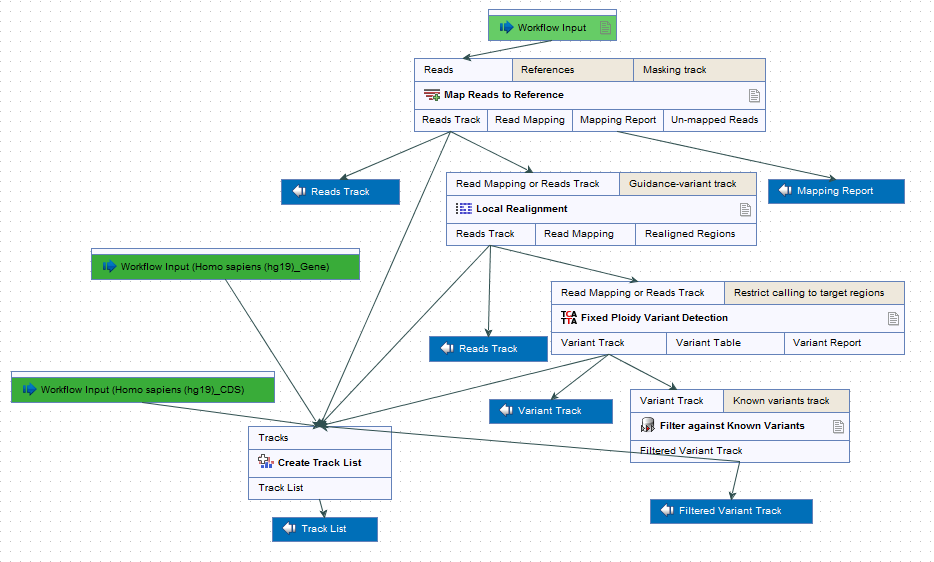
Figure 9.17: Generation of a track list including data generated within the Workflow, as well as data held in the Workbench.
Change the order of tracks in the Track List
When modifying an existing workflow or creating a custom workflow that include the tool Create Track List you may want to be able to adjust the order in which the tracks are shown in the Track List. To do this, display a view of the workflow layout, click once on the top part of the tool Create Track List labeled "Tracks" followed by a right-click. In the pop up menu that appears (figure 9.18), choose the option "Order Workflow Inputs".

Figure 9.18: Right click on the workflow layout and choose the option "Order Inputs...".
This opens a new pop up window (figure 9.19 where you can see a list of all the inputs that are connected with the input channel of the Create Track List tool. Use the arrows found in the left-hand side to move the tracks up or down until you have the desired track order in your Track List.
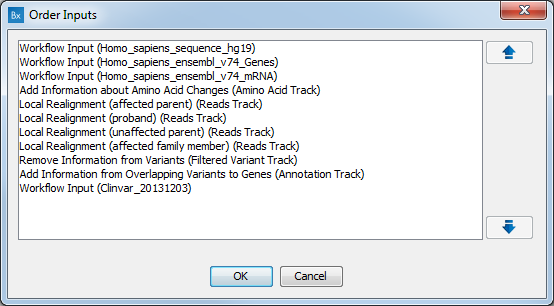
Figure 9.19: Example of Order Inputs window that appears when choosing the option "Order Inputs...".
If the workflow also generated several variant tracks, the variant table generated from the uppermost read mapping will open in split view with the Track List. By changing the Order of Inputs you can thus also influence which variant table should open in split view.