Configuring the Cloud Server Plugin
After installing the Cloud Server Plugin on the CLC Server and restarting, the connection to your CLC Genomics Cloud Engine can be configured. There must be an active AWS S3 location configured on the CLC Server, as described in the CLC Server admin manual at https://resources.qiagenbioinformatics.com/manuals/clcserver/current/admin/User_Manual.pdf. During configuration, you will be asked to provide the name of a bucket to use as the cache bucket for the CLC Genomics Cloud Engine. This must be a bucket within an active AWS S3 location.
After the configuration described here is completed, and before jobs can be submitted to CLC Genomics Cloud Engine via the CLC Server, one or more GCE presets must also be configured, as described in Configuring GCE presets.
To configure the Cloud Server Plugin, navigate to the Extensions tab in the CLC Server web administrative interface and click on the Edit GCE connection settings button. Click on the Edit button next to Cloud Plugin in the window that appears (figure 5.1).
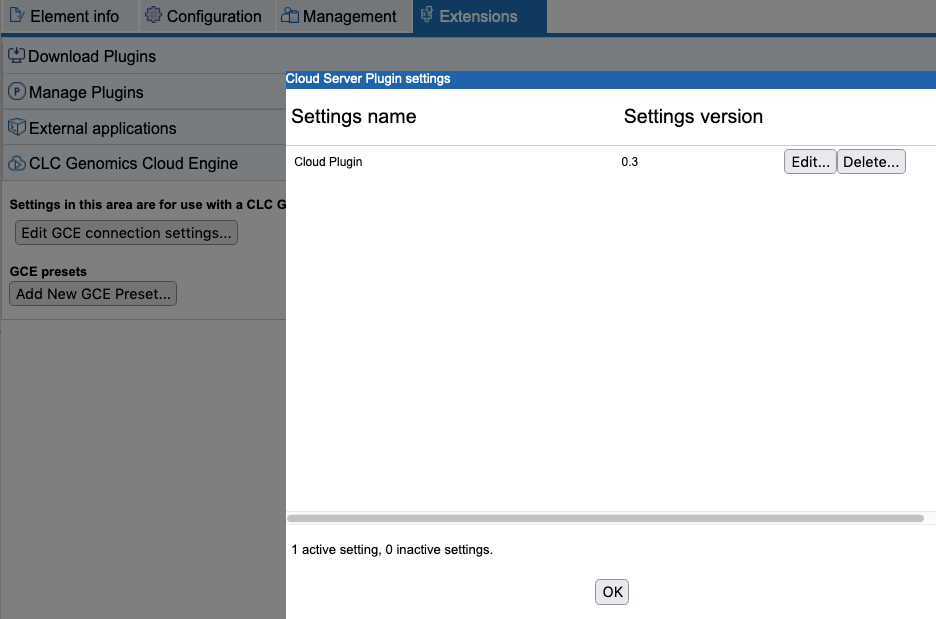
Figure 5.1: The GCE connection settings can be configured after clicking on the Edit button for the Cloud Plugin.
The CLC Genomics Server uses the OAuth2 Client Credentials Grant flow for authentication. This flow, suitable for server-to-server integration, ensures that the CLC Genomics Server has valid credentials that do not need to be periodically renewed. CLC Workbench users who connect to the CLC Genomics Server are granted access to the CLC Genomics Cloud Engine via the CLC Server's credentials, but jobs are run under the user's username.
The settings to configure (figure 5.2) are:
- GCE S3 cloud cache bucket name: The AWS S3 bucket to be used as a cache bucket. Your CLC Genomics Cloud Engine will know the name of the cache bucket. The relevant AWS S3 access credentials must be configured using the standard functionality of the CLC Genomics Server, described in the CLC Server admin manual at https://resources.qiagenbioinformatics.com/manuals/clcserver/current/admin/User_Manual.pdf.
An error message is presented in the configuration dialog if the cache bucket named cannot be found. This could happen if, for example, that relevant AWS S3 location had not been configured in the CLC Genomics Server or the named bucket could not be found in that location.
- GCE job mananger rest host URI: The URL pointing to the GCE instance deployed on the specified AWS account, as described in Prerequisites. This location is used for jobs submitted to GCE via CLC Genomics Server client software. If CLC Workbench users choose to also configure GCE connection settings directly in their Workbench, the location they configure must be the same as that provided here.
- GCE http oauth2 client id: The client ID used used by the CLC Genomics Server to authenticate using OAuth2 Client Credentials Grant.
- GCE http oauth2 client secret: The client secret used by the CLC Genomics Server to authenticate using OAuth2 Client Credentials Grant.
- GCE http oauth2 authorization server: The access token endpoint of the authentication server used by the CLC Genomics Cloud Engine.
- Accept untrusted certificate: This checkbox should be selected when the GCE has been set up with a self-signed certificate. We recommend setting up the GCE with a trusted certificate.
- Validate settings: This option, enabled by default, validates the AWS and GCE settings when you press OK. Uncheck this box only if you need to temporarily store invalid settings.
- GLOBAL_OVERRIDABLE: This setting has no effect for the Cloud Server Plugin and we recommend leaving it at the default settings.
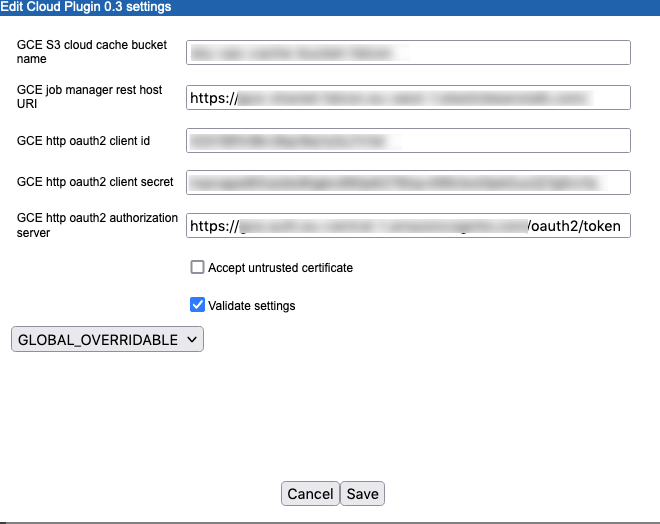
Figure 5.2: Configuration of the Cloud Server Plugin settings
One or more GCE presets should now be configured, as described in Configuring GCE presets.