To translate a nucleotide sequence into a protein sequence use the Translate to Protein tool, available at:
Tools | Classical Sequence Analysis (![]() ) | Nucleotide Analysis (
) | Nucleotide Analysis (![]() )| Translate to Protein (
)| Translate to Protein (![]() )
)
This opens the dialog displayed in figure 19.4:
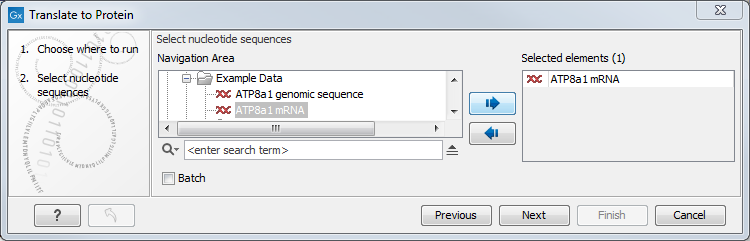
Figure 19.4: Choosing sequences for translation.
Use the arrows to add or remove sequences or sequence lists from the selected elements list.
Clicking Next generates the dialog seen in figure 19.5:
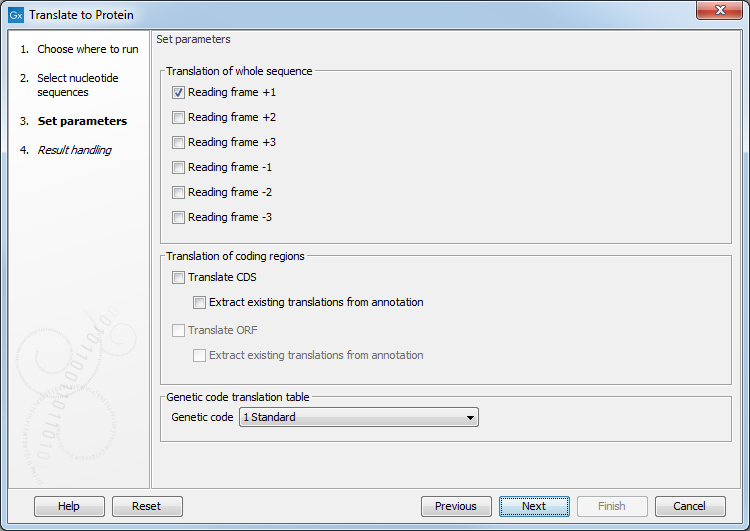
Figure 19.5: Configure the translation options. Hover the mouse cursor over a genetic code option to reveal a tooltip containing the relevant translation table.
Here you have the following options:
Stop codons result in an asterisk being inserted in the protein sequence at the corresponding position.
Click on Finish to launch the analysis. The newly created protein is shown, but is not saved automatically.
To save a protein sequence, drag it into the Navigation Area or press Ctrl + S (![]() + S on Mac) to activate a save dialog.
+ S on Mac) to activate a save dialog.
The name for a coding region translation consists of the name of the input sequence followed by the annotation type and finally the annotation name.
If you want to make separate translations of all the coding regions of a nucleotide sequence, you can check the option: "Translate CDS/ORF..." in the translation dialog (see figure 19.5).
If you want to translate a specific coding region, which is annotated on the sequence, use the following procedure:
Open the nucleotide sequence | right-click the
ORF or CDS annotation | Translate
CDS/ORF... (![]() )
)
A dialog opens to offer you the following choices (figure 19.6):
Choose the option needed and click Translate.
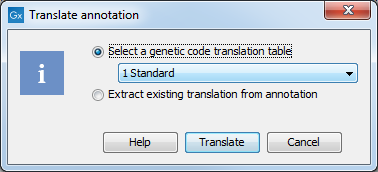
Figure 19.6: Choosing how to translate CDS or ORF annotations.
The CDS and ORF annotations are colored yellow as default.