How to run the Identify Somatic Variants from Tumor Normal Pair (WGS) workflow
To run the Identify Somatic Variants from Tumor Normal Pair (WGS) tool, go to:
Toolbox | Ready-to-Use Workflows | Whole Genome Sequencing (![]() ) | Somatic Cancer (
) | Somatic Cancer (![]() ) | Identify Somatic Variants from Tumor Normal Pair (WGS) (
) | Identify Somatic Variants from Tumor Normal Pair (WGS) (![]() )
)
- Go to the toolbox and double-click on the Identify Somatic Variants from Tumor Normal Pair (WGS) ready-to-use workflow. This will open the wizard shown in figure 12.20 where you can
select the tumor sample reads.
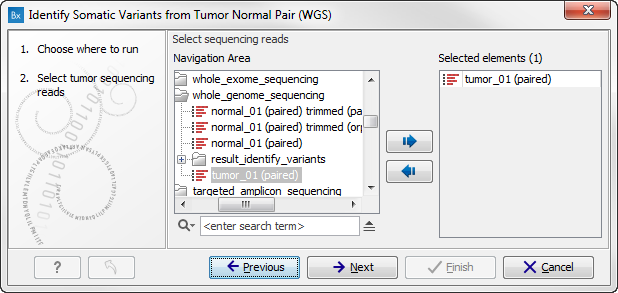
Figure 12.20: Select the tumor sample reads.When you have selected the tumor sample reads click on the button labeled Next.
- In the next wizard step (figure 12.21),
please specify the normal sample reads.
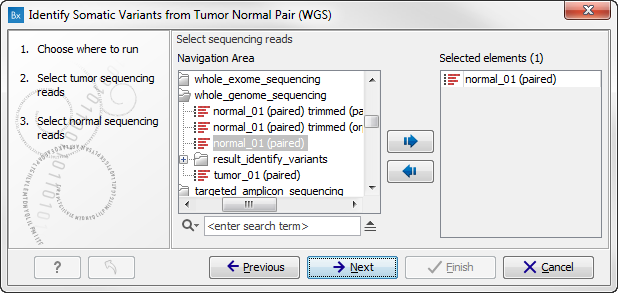
Figure 12.21: Select the normal sample reads. - In the next wizard step you can adjust the settings used for variant detection (figure 12.22). For a description of the different parameters that can be adjusted in the variant detection step, we refer to the description of the Low Frequency Variant Detection tool in the Biomedical Genomics Workbench user manual (http://www.clcsupport.com/biomedicalgenomicsworkbench/current/index.php?manual=Low_Frequency_Variant_Detection.html). If you click on "Locked Settings", you will be able to see all parameters used for variant detection in the ready-to-use workflow.
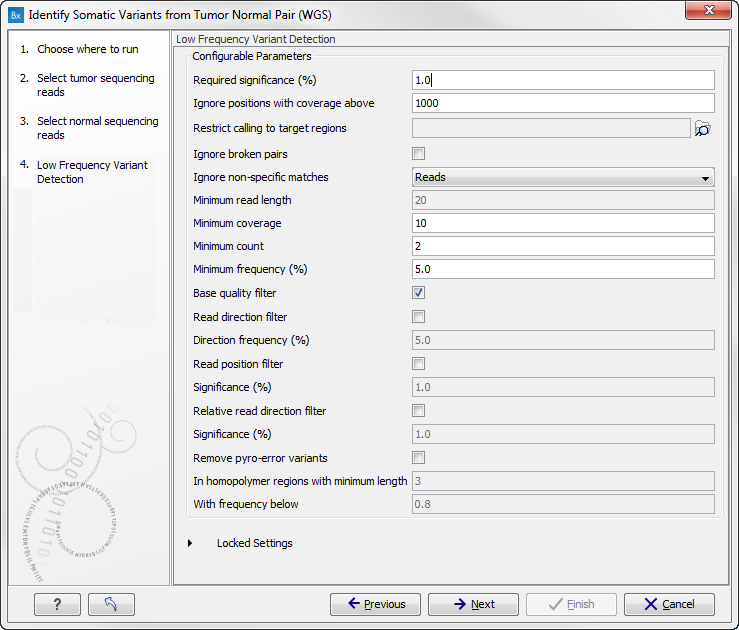
Figure 12.22: Specify the settings for the variant detection.In this wizard step you can adjust the settings used for variant detection. For a description of the different parameters that can be adjusted in the variant detection step, we refer to the description of the Low Frequency Variant Detection tool in the Biomedical Genomics Workbench user manual (http://www.clcsupport.com/biomedicalgenomicsworkbench/current/index.php?manual=Low_Frequency_Variant_Detection.html). If you click on "Locked Settings", you will be able to see all parameters used for variant detection in the ready-to-use workflow.
- Click on the button labeled Next to go to the step where you can adjust the settings for removal of germline variants (figure 12.23).
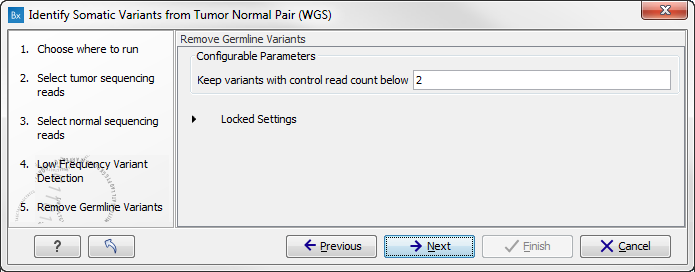
Figure 12.23: Specify setting for removal of germline variants.Click on the button labeled Next.
- In the next wizard step you can check the selected settings by clicking on the button labeled Preview All Parameters (figure 12.24).
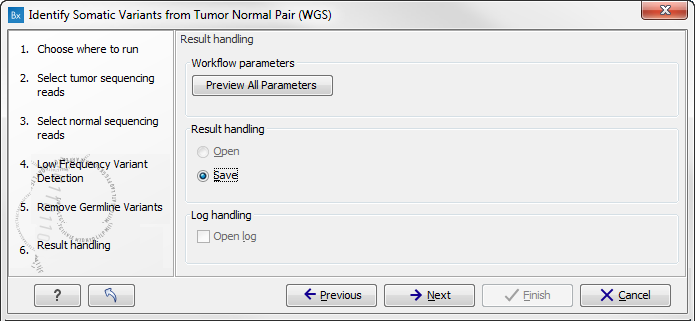
Figure 12.24: Check the parameters and save the results.In the Preview All Parameters wizard you can only check the settings, and if you wish to make changes you have to use the Previous button from the wizard to edit parameters in the relevant windows. At the bottom of this wizard there are two buttons regarding export functions; one button allows specification of the export format, and the other button (the one labeled "Export Parameters") allows specification of the export destination. When selecting an export location, you will export the analysis parameter settings that were specified for this specific experiment.
- Click on the button labeled OK to go back to the previous wizard step and choose Save.
Note! If you choose to open the results, the results will not be saved automatically. You can always save the results at a later point.