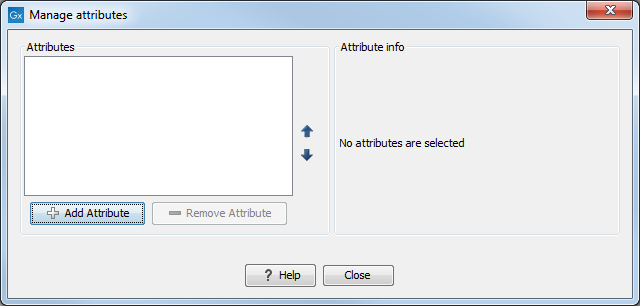
Figure 3.27: Adding attributes.
Location-specific attributes can be set on all elements stored in a given data location. Attributes could be things like company-specific information such as LIMS id, freezer position etc. Attributes are set using a CLC Workbench acting as a client to the CLC Server.
Note that the attributes scheme belongs to a particular data location, so if there are multiple data locations, each will have its own set of attributes.
To configure which fields that should be available3.2 go to the Workbench:
right-click the data location | Location | Attribute Manager
This will display the dialog shown in figure 3.27.
Figure 3.27: Adding attributes.
Click the Add Attribute (![]() ) button to create a new attribute. This will display the dialog shown in figure 3.28.
) button to create a new attribute. This will display the dialog shown in figure 3.28.
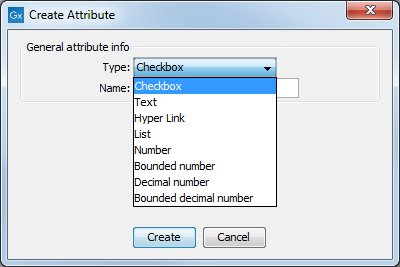
Figure 3.28: The list of attribute types.
First, select what kind of attribute you wish to create. This affects the type of information that can be entered by the end users, and it also affects the way the data can be searched. The following types are available:
When you click OK, the attribute will appear in the list to the left. Clicking the attribute will allow you to see information on its type in the panel to the right.
Lists are a little special, since you have to define the items in the list. When you choose to add the list attribute in the left side of the dialog, you can define the items of the list in the panel to the right by clicking Add Item (![]() ) (see figure 3.29).
) (see figure 3.29).
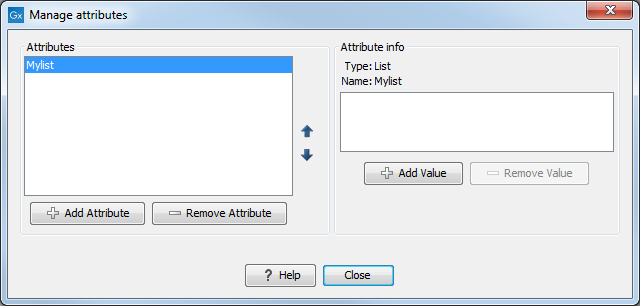
Figure 3.29: Defining items in a list.
Remove items in the list by pressing Remove Item (![]() ).
).
If you accidentally removed an attribute and wish to restore it, this can be done by creating a new attribute of exactly the same name and type as the one you removed. All the "static" values will now become editable again.
When you remove an attribute, it will no longer be possible to search for it, even if there is "static" information on elements in the data location.
Renaming and changing the type of an attribute is not possible - you will have to create a new one.