Manage enzymes
The list of restriction enzymes contains per default some of the most popular enzymes, but you can easily modify this list and add more enzymes by clicking the Manage enzymes button found at the bottom of the "Restriction sites" palette of the Side Panel.
This will open the dialog shown in figure 32.6.
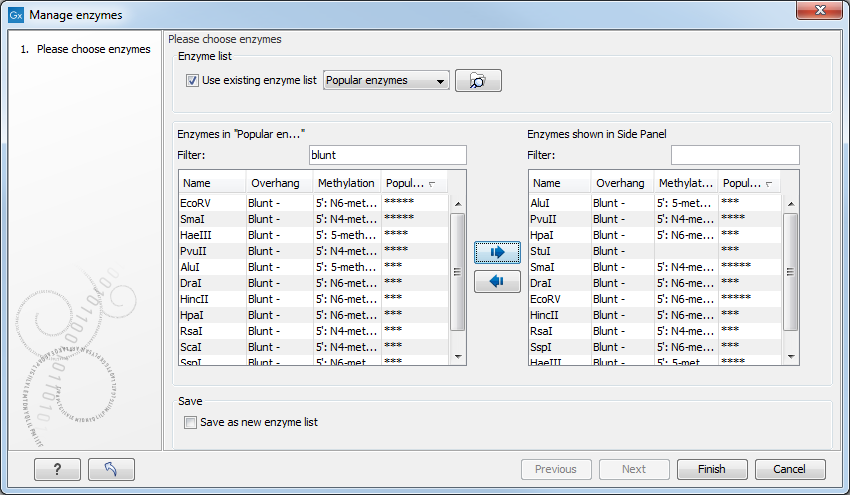
Figure 32.6: Adding or removing enzymes from the Side Panel.
At the top, you can choose to Use existing enzyme list. Clicking this option lets you select an enzyme list which is stored in the Navigation Area. A list of popular enzymes is available in the Example Data folder you can download from the Help menu.
Below there are two panels:
- To the left, you can see all the enzymes that are in the list selected above. If you have not chosen to use a specific enzyme list, this panel shows all the enzymes available.
- To the right, you can see the list of the enzymes that will be used.
Select enzymes in the left side panel and add them to the right
panel by double-clicking or clicking the Add button
(![]() ).
).
The enzymes can be sorted by clicking the column headings, i.e., Name, Overhang, Methylation or Popularity. This is particularly useful if you wish to use enzymes which produce a 3' overhang for example.
When looking for a specific enzyme, it is easier to use the Filter. You can type HindIII or blunt into the filter, and the list of enzymes will shrink automatically to only include respectively only the HindIII enzyme, or all enzymes producing a blunt cut.
If you need more detailed information and filtering of the enzymes, you can hover your mouse on an enzyme (see figure 32.7). You can also open a view of an enzyme list saved in the Navigation Area.
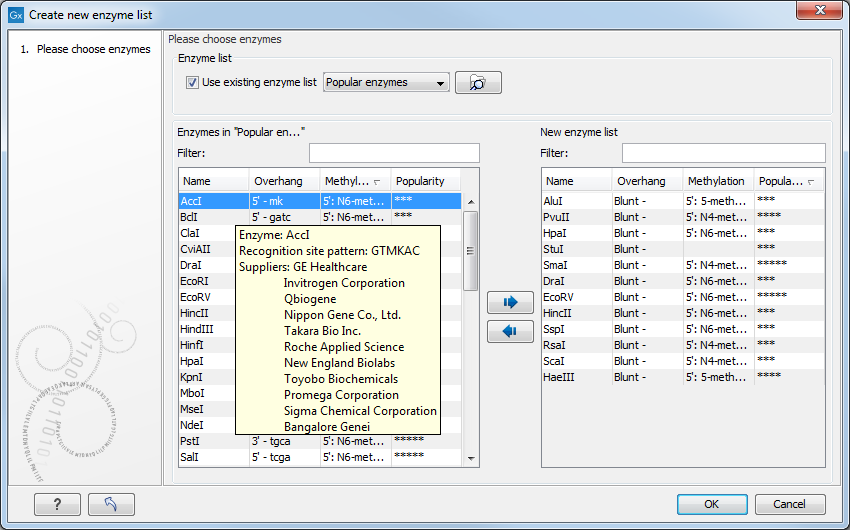
Figure 32.7: Showing additional information about an enzyme like recognition sequence or a list of commercial vendors.
At the bottom of the dialog, you can select to save the updated list of enzymes as a new file. When you click Finish, the enzymes are added to the Side Panel and the cut sites are shown on the sequence. If you have specified a set of enzymes which you always use, it will probably be a good idea to save the settings in the Side Panel for future use.